(Normal mode only)
You may work with several Gruntz at the same time


 , Moundz
 and Spikez
 , with a few Dice
 thrown in for good measure.
Steel yourself! Then cross a couple Spikez
Tilez to the Silver Timer Switch (STS)  . Silver Pyramidz (SP)
  will lower
  (temporarily), allowing you to reach a place where you may put your Tool to good use.
Do you want to know the most efficient route to take?
"Hey! How am I supposed to get past this?!?"
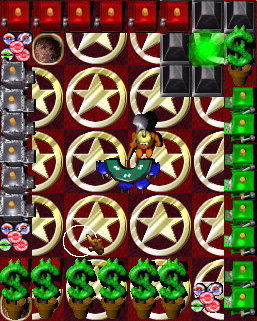
(After you have sucked up four Goo Puddlez
 , and picked up a Coin, you find yourself with nowhere you can go.
"Hey Rube!" With a little bit of help from a buddy, you collect two more Coinz and the Warp letter 'P'.
"'P'? What happened to 'W', 'A' and 'R'?"
(Well, you are a bit slow with the sucking, and other team memberz have found those Warp letterz while you were dawdling.)
You exit into the six card table room, and pick up the Coin you see.
You want to exit to the north, but you don't like the action of the 'sliding door'. Is there a Tool you may use to fix it?

 that is acting as a 'sliding door' to the north. Use that shovel to do what it does best. Make certain that after you have eliminated that 'sliding door', that the area is made safe for any Grunt to pass through it! You may even collect a Coin for your trouble!
Next, make your way north to the four card table room and patch up three Holez
 and do whatever else needz doing there.
Make your way back down south, past the large pool and head east.
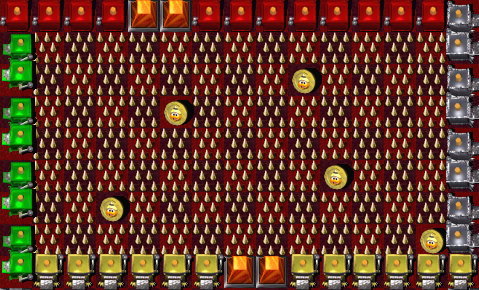
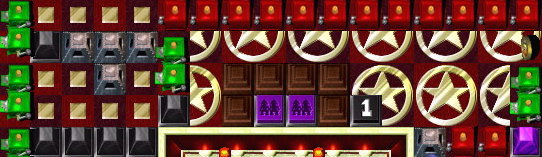
The double doorz toward the east should be open, allowing you to enter the room where GooberStraw and Bootz entered the game. There are a lot of Spikez in the room, and there is no way around it ... you will have to step on many of them. "Ouch! My feet! These hurt!" Turning Holez
into Moundz (or ordinary Tilez) will allow you to spare those tender feet some pain.You can see a Coin and a Megaphone in the southeast corner of the room ... surrounded by Holez
, and Spikez .You can also see a Black One-Time Switch
 in the northeast corner ... surrounded by Holez , and Spikez .
"Hmmm. This'll be tough! I sure hope there's some Zap Cola around this room!"
Want to see how the Designer did it?
As you probably suspect, there is some assistance from a buddy properly equipped
 .
. 
Your health will not allow you to leave the room, equipped as you are. Check the Tool Chest for something that might help you survive.
 on your way. When SPz stop moving, step on the STS to start them moving again, so GooberStraw may move on to the next set of four Goo Puddlez . Keep close to that STS, stepping on and off of it until your buddy is on his way out of the GooRoo room.
Then get out of the Foyer before the triple doorz
 close!
 Once those doorz are locked, you are forced to go through the GooRoo room.
If (when?) you are able to do so, go up and collect the five Coinz in the Spikez room.
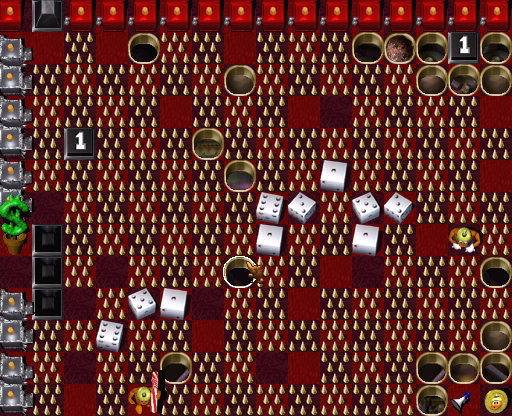
Then return and stand next to the Dice, nearest the
, and wait for Grumley to crank out something you can use in the area.
to accomplish your task. Being a naturally sharing type of Grunt, you only take enough of the Zap Cola that is revealed to keep you out of the red on your health badge. (Your buddy lookz like he needz refreshmentz more than you do.) When there is nothing more left to break, you see what else Grumley may have to offer for your use.
You see two other Coinz, and a lot of breakable objectz that you know you can reach.
Find something to break!
Hint: You should keep those Gauntletz for a long time ... until they break!
So you get to work, breaking large Dice


 and small Dice , revealing more Coinz, a Yellow Toggle Switch
  , a Black One-Time Switch and a Tool.
There is even a can of Zap Cola under one of the Die Cubez!
But you didn't work up much of a sweat, and no enemy Gruntz were doing their best to reduce your health, so you leave it where you found it.
Someone else may need it later.
Hang around in the area until one of your buddiez thankz you for your help.
Then take a walk into the Blue Wormhole, and see where it takez you.
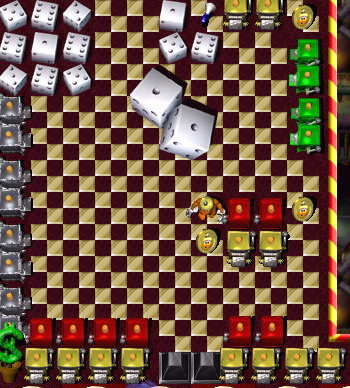
You land on your feet in the western courtyard, and see that there is plenty for you to do here.
You break a Die Cube
and pick up a Coin, then step on a Black One-Time Switch and break another Die Cube .You notice that the door is now open into the southern courtyard, and see that there is more use for your Tool down there.
You break a Die Cube
and then another Die Cube and pocket the Coin you find. Then you break two more Dice . You may break the remaining Die Cube if you wish, but another Grunt can take care of it later.Cool your heelz for a while back in the western courtyard, until the
into the northern courtyard are open .Move into the northern courtyard and break those Brickz
 that may be safely broken.
You reach the point where the only Brick you may (safely) break is a Gauntletz-breaker
 . Go ahead and break it, then take your place on a Purple Multi-Grunt Switch (PMGS)
  .
.
"Hey! I didn't see that before!"
The doorz out of this room seem to be locked
, so you must wait for a buddy to unlock (some of) them.When the door openz
, go through the Green Wormhole and see if there is a place available for you on one of the Purple Multi-Grunt Switchez (PMGS) .
(It may be helpful to not go through the first door that is unlocked ... in case someone else misses his cue for some work to be done.)See the task list for Shovel #5.

Your buddy with the GooberStraw
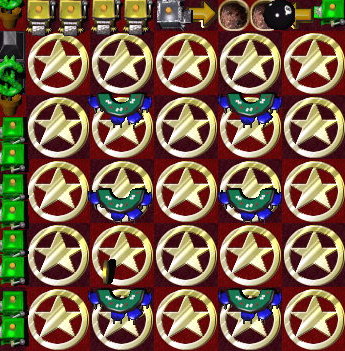
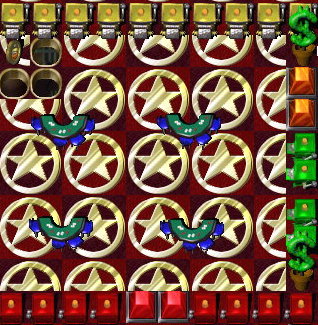
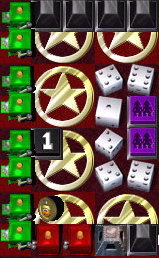
is slow with his assigned task, so ... start walking!Head for the Coin you see in the midst of six Switchez. It doesn't hurt to step on the lowered Orange Switch
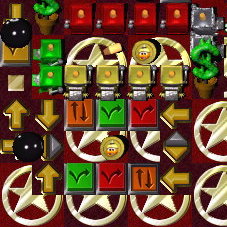
 or either Red
  toggle Switch, but don't step on that raised Orange Switch
  or either Green
  toggle Switch until GooberStraw completez his task!
If you stepped on anything other than the lowered Orange Switch
to get the Coin, step on the other colored Switch after stepping on the raised Orange Switch when leaving the area.At this time, it is important that the Red
toggle Switchez are stepped on an odd number of timez!Scan the puzzle area. The Orange Pyramidz
 into the TrapDoor room must be lowered
 . That will also lower the doorz into the four card table room, and the doorz between the medium sized room that is being remodeled and the largest room being remodeled, and on to the smallest room being remodeled. The doorz
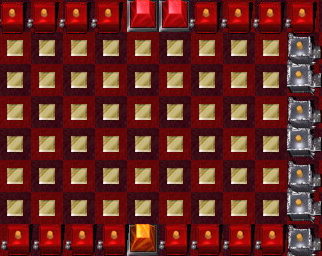
 between the four card table room and the medium sized room that is being remodeled should also be open.
Walk to the north entrance to the TrapDoor room, and pick up the Coinz, leaving through the south doorz
.Go get the Coin in the four card table room and down to the Coin in the smallest room being remodeled. Step on the Black One-Time Switch
and continue on into the two card table room for one more Coin.
You may now want to blow a few tornadoez at the enemy Toobz Grunt to turn him into a Goo Puddle
 (or just get rid of him), to make thingz easier, later on.
Walk back up to the northwest corner of the map, and exchange your Wingz for some Springz. (Gauntletz should still be hanging around the area. Put him to work on the Yellow Toggle Switch
, to help you in your next task.)

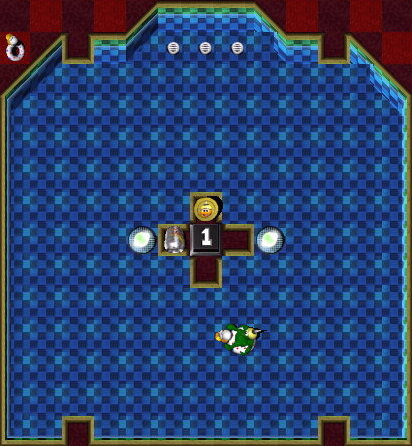
Well, there is a 'lap pool' to the east, with a Black One-Time Switch
 on a diving platform in the middle. Hop to it! You have no choice but to pick up and use the Megaphone on your way out of the pool. And there is a Coin in the northeast corner, poolside, as a reward.
Make your way out of the 'lap pool' room (with the aid of your Gauntlez buddy) and meet him at his door
.Send him through the Blue Wormhole, and you go collect the Coin you see on the other side of that Wormhole.
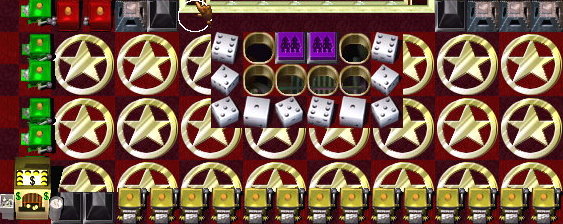
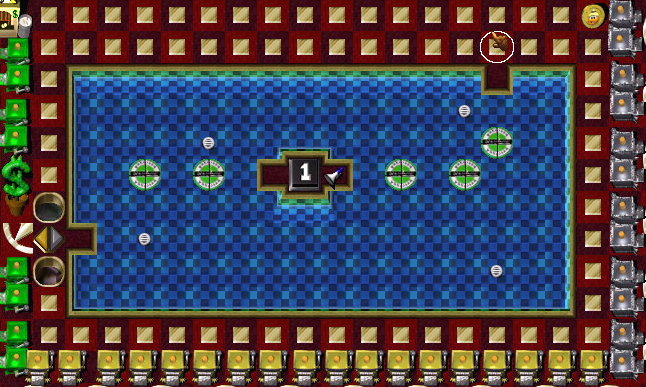
Go on into the Arrowz room. Choose wisely in order to be able to reach each Yellow Toggle Switch
 you see in the room, so that you may collect the Coinz you see, activate the Black One-Time Switch and continue to the exit.
The result is that a R8B startz rolling across Arrowz and Switchez, and you know that somewhere there are Pyramidz going Up and Down.
Now you have a choice to make:
- Take your Springz to the labyrinth room, and perform the taskz required there.
- Go down to the large pool where you saw the enemy Toobz Grunt, and get the Toob at poolside. (Recommended.)
 . There just might be a Grunt whose intent is to prevent you from performing your task. Keep that Keg of Zap Cola where you can reach it!
Now waddle your way up to the labyrinth room, and take care of the taskz required there.
Finally, take your place on a Purple Multi-Grunt Switch (PMGS)
.
 in the southern courtyard and put it to good use. Pocket any Coinz revealed when you strike gold, but be prepared to move quickly if you hear a ticking sound! Then take your place on one of the Purple Multi-Grunt Switchez (PMGSz) .Megaphone.
 into the northern courtyard are open , take a walk up into the northern courtyard, and use your gear on the triple layer Brickz you find there. (They are not what they seem to be.) After the true nature of the stackz is revealed, take your place on one of the Purple Multi-Grunt Switchez (PMGSz) .
 .
.Then go through the Blue Wormhole
 to the King�z Fortress.
Do not be in a rush to give the Warpstone
 to the King!
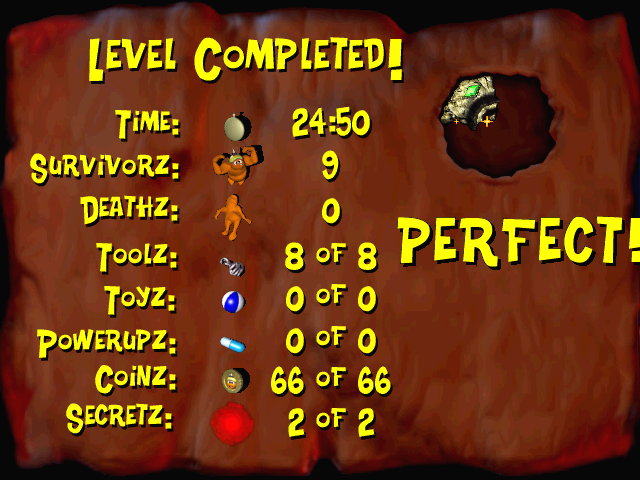
There are several Coinz you should pick up first, if your goal is a "PERFECT!" score.