Walkthrough
|
| 21
| Split Up And Reunion ... CheckPoint #6    |
| Grunt(z) |
What to do to solve the puzzle |
 Gauntletz #2, Gauntletz #2,
 Rockz #4 and Rockz #4 and
 Springz #3 Springz #3 |
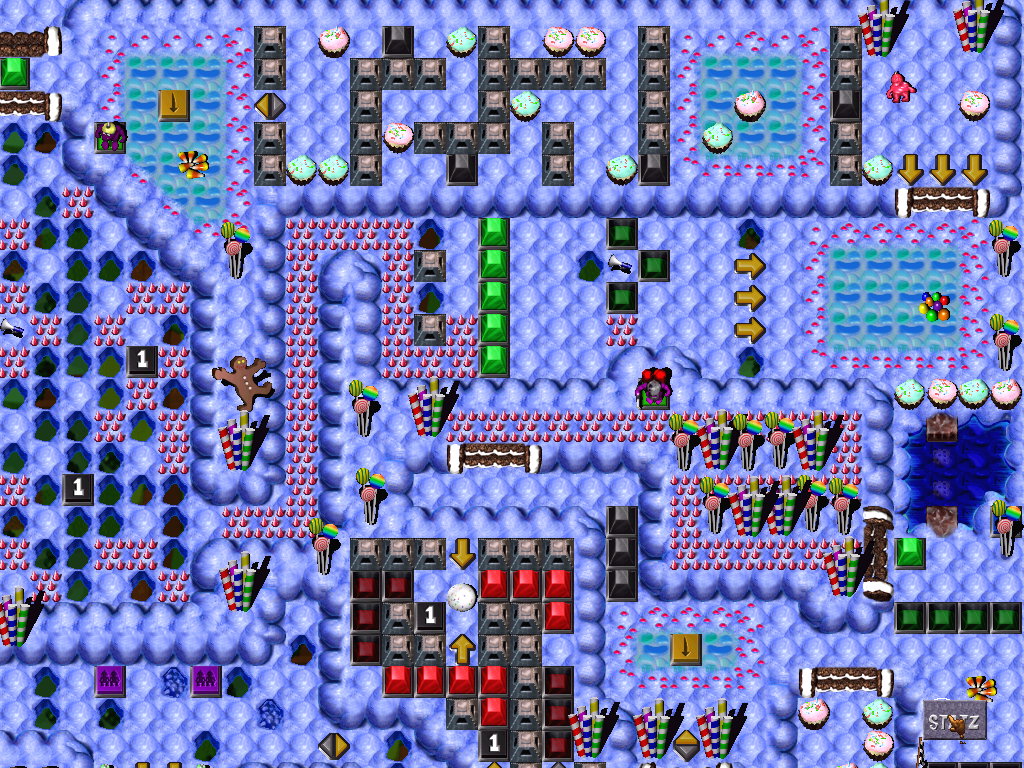
- Gauntletz #2
- Breakz a cupcake
 , revealing a Keg of Zap Cola , revealing a Keg of Zap Cola  . .
- Signalz Springz #3 forward for the refreshmentz, and to go through the first BW
 . .
- Breakz a cupcake , revealing another Keg of Zap Cola .
- Signalz Rockz #4 forward for the refreshmentz, and to go through the next BW .
- Breakz a cupcake , revealing another Keg of Zap Cola .
- Downz it himself, and goez through the last BW and setz off to the area on the lower right side.
- Goez east to break the cupcakez (has gone far enough when something
 explodez) and getz the Coin explodez) and getz the Coin  (#21). (#21).
- Goez back to relieve Springz #3 on the YTS
 . .
- Springz #3
- Obediently downs a Keg of Zap Cola
 . .
- Divez through the nearest BW , which takez him (and the rest of the team) to the meeting place and setz off to the area on the lower right side.
- Makez his way through the Spikes
 /holez /holez  maze to use the Megaphone -- Gravity Bootz maze to use the Megaphone -- Gravity Bootz  and jump on one BOTS and jump on one BOTS  . .
- Movez back to the YHS
 near the entrance to this area. near the entrance to this area.
- Goez east through the space cleared by the Gauntletz #2 and past the Arrowz
 to the south. to the south.
- Goez west and getz the Megaphone -- Shovel
 and movez west to the GPz and movez west to the GPz  . .
- When the GPz are lowered
 , jumpz across a Hole and landz on the first of thirteen Spikez (losez his Springz) in the long spike walkway leading back to the holez /Spikez maze and walkz to the end. , jumpz across a Hole and landz on the first of thirteen Spikez (losez his Springz) in the long spike walkway leading back to the holez /Spikez maze and walkz to the end.
- Rockz #4
- Obediently downs a Keg of Zap Cola .
- Divez through the nearest BW and setz off to the area on the lower right side.
- Tossez a rock (repeatedly) at the enemy grunt
 standing on the GHS standing on the GHS  to lower the GP . to lower the GP .
- Standz next to the GP .
- Stepz on four Spikez Tilez on his way to stepping on three BOTSz .
- Stepz on the same four Spikez Tilez on his way back to the entrance to this area.
- Goez east through the space cleared by Gauntletz #2 and past the Arrowz to the south.
- Eliminatez the enemy grunt
 . .
|
 Bare-handed #3 Bare-handed #3 |
Takez the Shovel (Tool #15) from the GruntzMachine (Resourcez).
|
 Shovel #3, Shovel #3,
Gauntletz #2 |
- Shovel #3
- Fillz in six Holez to create a path through the maze to join Gauntletz #2.
- Relievez Gauntletz #2 on the YHS .
- Goez back through the (now) Moundz
 /Spikez maze to the Spikez walkway. /Spikez maze to the Spikez walkway.
- Takez the Gravity Bootz (Tool #16) from the GruntzMachine (Resourcez).
- Gauntletz #2
- Goez east through the space he cleared earlier and past the Arrowz to the south.
- Breakz one of two cupcakez
  , revealing a Toob , revealing a Toob  and a Jack-In-The-Box and a Jack-In-The-Box  . .
- Takez the Jack-In-The-Box (Toy #4) for himself
|
 Bootz #3, Bootz #3,
Rockz #4 |
- Bootz #3
- Goez through the Spikez walkway and across the GPz to join Gauntletz #2.
- Rockz #4
- Pickz up the Toob (Tool #17).
|
 Toob #4, Toob #4,
Bootz #3 and
Gauntletz #2 |
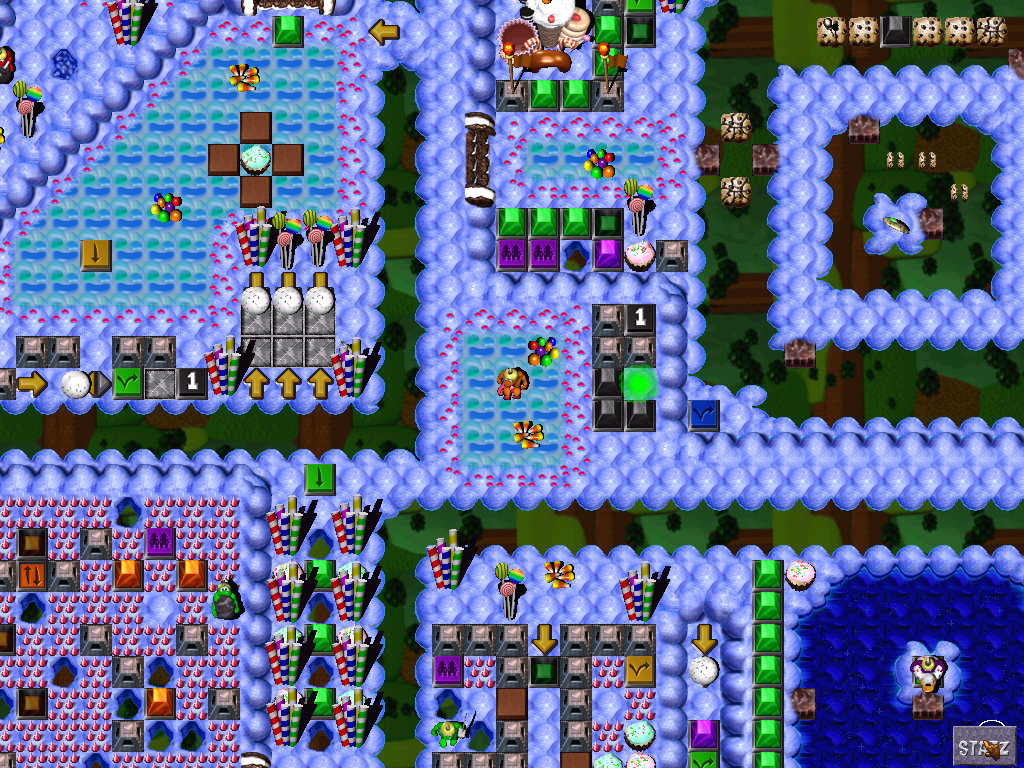
- Toob #4
- Goez across the water and stepz on the BTS
 . .
- Goez to the GP and waitz.
- When the GP are lowered , waddlez to the YHS .
- Goez to his CPS
 . .
- Bootz #3
- Goez upstairz to stand on the GHS to the west.
- Goez downstairz
   and through the lowered BPz and through the lowered BPz  . .
- Goez to his CPS
 . .
- Gauntletz #2
- When the GP are lowered , givez the toy to the enemy grunt
 . .
- Stepz on the BOTS and breakz the lower right cupcake to get the Coin (#22).
- Movez to the TWA
 to the left of the enemy grunt , and goez across the YTS , to the left of the enemy grunt , and goez across the YTS ,
and the TWA on the left is pointing down , and the TWA on right is pointing up  ... step on it again, ... step on it again,
(so the TWA on the left is pointing up , and the TWA on right is pointing down ).
- Stepz on the Arrow
 (and is forced to step on the BOTS ). (and is forced to step on the BOTS ).
- Enterz the RPz
  and exitz on the Arrow where the RSB and exitz on the Arrow where the RSB  is rolling up and down. is rolling up and down.
- Stepz on the BOTS and exit the RPz .
- When Toob #4 waddled over to his CPS, the TWA reverted to its normal state .
- Stepz on the TWA and goez to his own CPS .
|
 Previous section Next section Previous section Next section  |