
Forum |
|

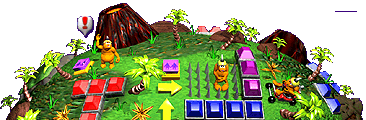
Space
|
Stage 1
|
Stage 2
|
Stage 3
|

Stage 4
|
|
|
|
|
|
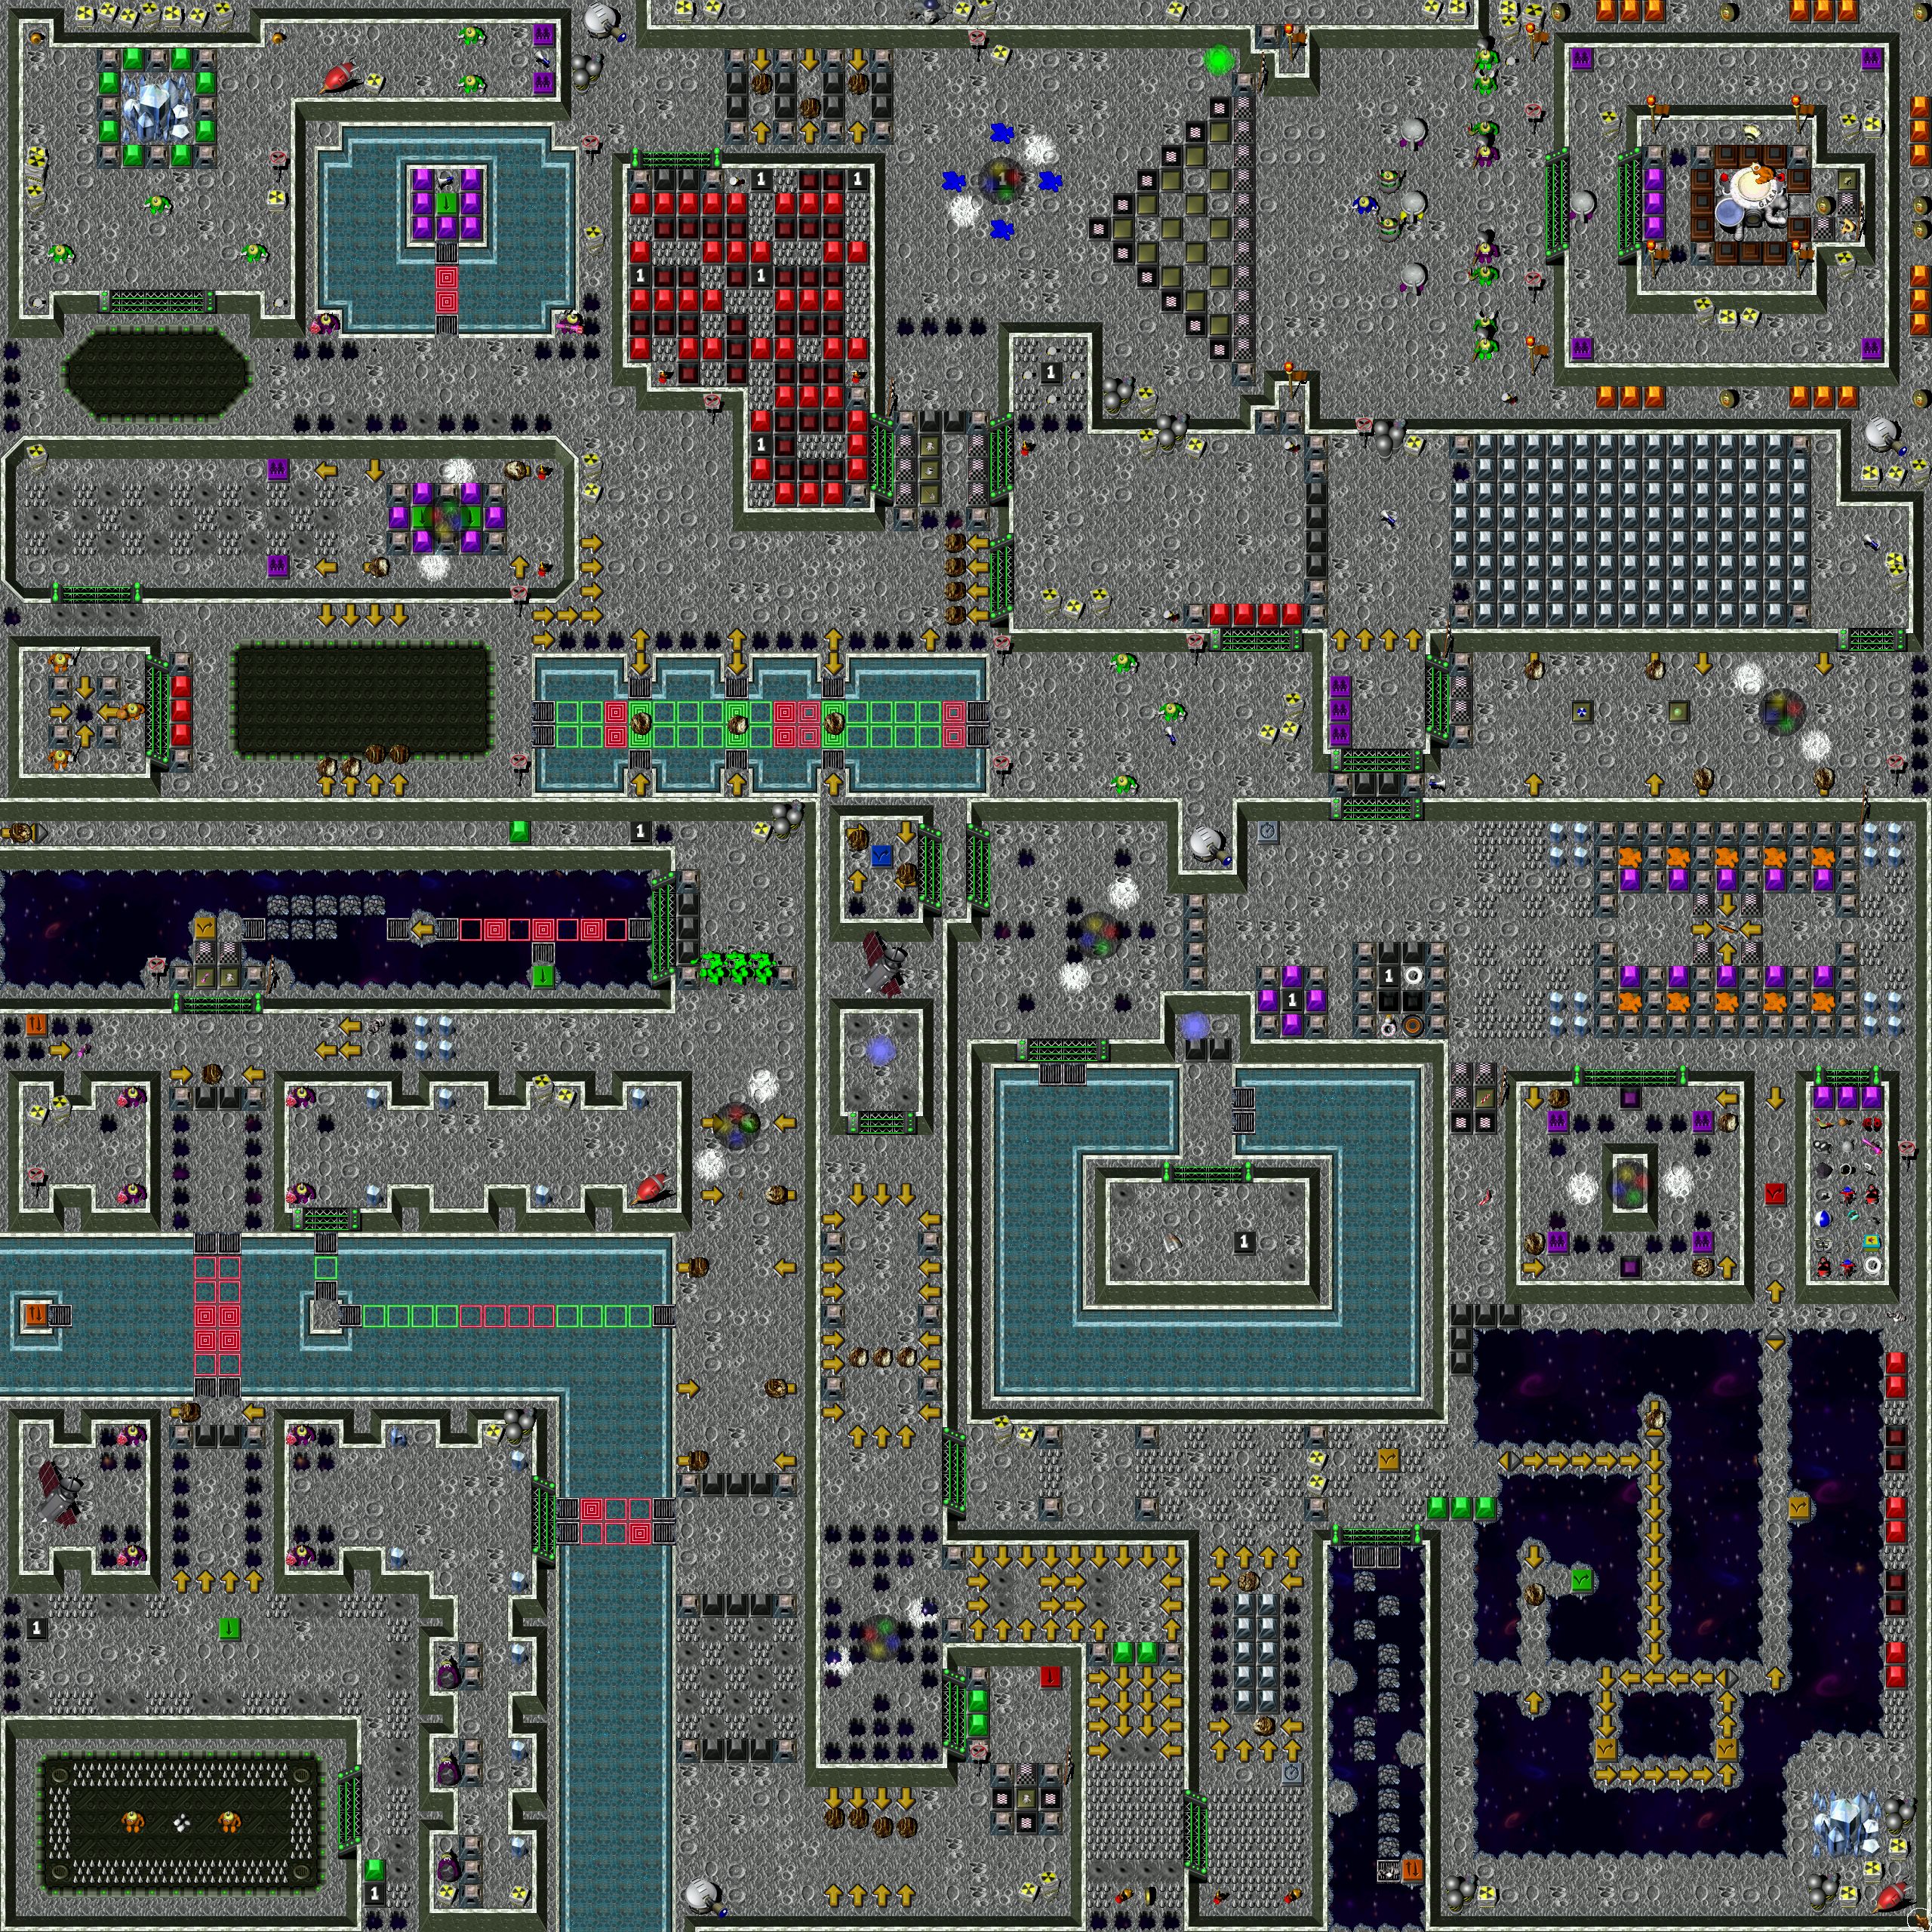
| View the map! |
- Start with two bare-handed gruntz
 and
(trapped) two sword gruntz and
(trapped) two sword gruntz and a club grunt and a club grunt
 . .
- Bare-handed grunt pickz up
the gravity bootz
 (Tool #1). (Tool #1).
- Gravity bootz grunt
 walkz toward the
green hold switch walkz toward the
green hold switch  . .
- Bare-handed grunt
- When Gravity bootz grunt is almost to
the green hold switch
- walkz over the (now lowered) green
pyramid

- stepz on the black one-time switch
 (lowerz two black pyramidz
  south of the bridge)
- then walkz toward the arrowz

- Gravity bootz grunt
- hitz the black one-time switch on
the left (lowerz two black pyramidz
north of the bridge)
- waitz on the spikez
 opposite the arrowz
- (his health is not important, he diez
anyway).
- Bare-handed grunt
- crossez the arrowz
between four enemy gruntz

- passez black pyramidz
toward the moving bridge
 
- In the middle of the bridge just walk
into the water toward the orange up/down
switch
 (Orange Switch #1) (Orange Switch #1)
- Throughout this level you have to hit a
total of six orange up/down switchez to
reach the '?' switch

- After hitting the switch, walk back to
the bridge and go between four more enemy
gruntz
to the CheckPoint Switch

- Leave the spongegun
 for
the gravity bootz grunt for
the gravity bootz grunt
- Gravity bootz grunt quickly getz to
the sponge gun (Tool #2).
- Spongegun grunt

- shootz the right enemy grunt
into the hole

- walkz to the single arrow
 near the orange up/down switch
- as the enemy grunt
is ready to shoot, stepz on the arrow and
when the shot arrivez, stepz on it again
- he will be shot onto the orange up/down
switch (Orange Switch #2)
- then shootz the left enemy grunt
into the hole
- shootz the bare-handed grunt over
the arrow
 by
shooting at the arrow, as the bare-handed
grunt stepz
onto the arrow ... to the gauntletz by
shooting at the arrow, as the bare-handed
grunt stepz
onto the arrow ... to the gauntletz  (Tool #3) ... and
together they hit the CheckPoint Switchez (Tool #3) ... and
together they hit the CheckPoint Switchez

- Gauntletz grunt
 crossez over
the upper part of the breakable bridge and
waitz in front of the arrow crossez over
the upper part of the breakable bridge and
waitz in front of the arrow
- Spongegun grunt
- Sacrificez himself; he walkz over the
yellow toggle switch
 toward the end of the bridge and shootz at
the arrow (certain death #1)
toward the end of the bridge and shootz at
the arrow (certain death #1)
- It may be possible for the
spongegun grunt to move
next to the arrow where the gauntletz
were, and shoot at the empty space below
the arrow and
have the gauntletz grunt step into
space, to arrive at the same place.
- Don't do
it, even if you can!
- Later on, you will have one too many
active gruntz (one in the wrong place,
where he doez absolutely no good) and be
unable to add a grunt where you need one.
Then you will have to come back to this
grunt, and send him off into space anyway
... after you have re-played from your
last SAVE.
- Gauntletz grunt
- crossez the toggling bridge
   to
the Landing area to
the Landing area 
- waitz on the green hold switch
until the rock
 has
passed the green pyramid has
passed the green pyramid
- Pass the black pyramidz and
lava geyserz

- break the four rock crystalz
 ,
revealing a blue toggle switch ,
revealing a blue toggle switch 
- step on the switch and proceed to the
platform with the single enemy grunt
- kill him, break the rock crystalz ,
and step on the black one-time switch
- walk back and proceed past rolling rockz
to
the next bridge
- break all the rock crystalz ,
step on the two black one-time switchez
- (it is possible to kill two of the enemy
gruntz
 ,
but it is not necessary, as you will not
be able to get their goo ,
but it is not necessary, as you will not
be able to get their goo  )W )W
- walk over the lava geyserz and
the spikez
- break the hidden rock crystal
under the telescope
- step on the orange up/down switch (Orange Switch #3)
that was under the rock crystal
- pass the rockz, hit the CheckPoint
Switch
- wait on the red hold switch
 . .
- Two sword gruntz step on the
purple multi-grunt switchez
 . .
- Club grunt
walkz to the left green hold switch beneath
the UFO.
- Gauntletz grunt walkz up,
passez the UFO and two lava geyserz
- Club grunt
stepz on the right green hold switch
- Gauntletz grunt
- Passez the last arrowz and pickz up the
coin #1

- drinkz a Bottle of refreshing Zap Cola

- (he won't need the Can and Bottle in the
next area)
- stepz on the silver timer switch
 and
goez toward the stairz on the left and
goez toward the stairz on the left
- pass the rolling rockz and
enter the blue wormhole
- step on the blue toggle switch
- With your scroll
 tucked
under your arm, and your magic wand tucked
under your arm, and your magic wand  held
tight, you weave your way under the UFO. held
tight, you weave your way under the UFO.
- Oh wait! That must be one of the version
1.0 errorz
... no magic wand, and no scroll.
- wait near the pool
- Club grunt
walkz back to the stairz, followed by the two
sword gruntz
- All three gruntz pass the rolling rockz
- Two sword gruntz
- go east across the two-lane bridge with
thirteen raised bridge
 tilez, and four toggling bridge
tilez per 'lane', criss-crossed by three
rolling rockz
tilez, and four toggling bridge
tilez per 'lane', criss-crossed by three
rolling rockz
- Both stop at the far landing area

- the northern one stepz diagonally north,
luring one enemy grunt
 toward him
- stepz back onto the landing area, and
(working together) they turn him into a
(usable!) goo puddle

- repeat the process (southerly) for enemy
grunt
#2
- Then simply charge right in to get rid
of enemy grunt
#3
- One grunt usez the megaphone
 -- toob
  (Tool #4) (Tool #4)
- (give the toob to the gauntletz grunt and have
him start paddling)
- while the other headz for the stairway
blocked by red pyramidz
 ...
climbs into the platform when they go down ...
climbs into the platform when they go down

- the other grunt then joinz him, and they
refresh themselvez with as much Zap Cola
 as they need
- both gruntz then go down the other
(southwestern) stairway and make their way
past the rolling rockz and
toward the northwest.
- Club grunt
(at the proper time) stepz on the upper arrow
make
his way past the rolling rockz and toward
the northwest.
- Club grunt
joinz the two sword gruntz at the stairway.
- Two sword gruntz and Club grunt
- One grunt (for example, ) approachez
the stairz, lurez one of the enemy gruntz
toward you and together attack him.
- Repeat for the other two enemy gruntz .
- When all three enemy gruntz
are killed, head toward the downed
spaceship and line up three abreast.
- The center grunt approachez the enemy
gruntz ,
luring both into attacking.
- Back in a line, you gang up and turn
both of them into (not very usable) goo
puddlez .
- One sword grunt usez the
megaphone
-- shovel (Tool #5)
- The other sword grunt standz on a
purple multi-grunt switch .
- The other sword grunt standz on
the other purple multi-grunt switch .
- The club grunt takez the
shovel from the GruntzMachine.
- Toob grunt

- Swimz around the island, getz the keg of
Zap Cola

- stepz on the black one-time switch
- enterz the blue wormhole
- hitz the yellow toggle switch
(releasing a rolling rock )
- stepz on the arrow
just as the circling rock hitz the upper
row
- walkz toward the next yellow toggle
switch
(which sendz the rolling rock off to
the right)
- stepz back and then forward again onto
the arrowz
- hitz the yellow toggle switch in
the middle of the next corridor
- waitz until the rock has
passed the two-way arrow

- getz the gauntletz Tool #6
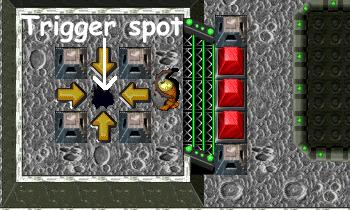
- Gauntletz grunt
- Stepz on the lowered red pyramidz ,
waitz a moment, then on the spikez
until the pyramidz go down again (five
timez)
- breakz the


|
giant rock
crystal, which revealz
|

|
- hitz the black one-time switch
- smashez the hidden
rock crystal
- hitz the orange up/down switch (Orange Switch #4)
- getz the wingz Tool
#7
- Wingz grunt

- walkz around the space and hitz the
green toggle switch
 behind the rolling rock
- walkz past the lowered green pyramidz to
either landing area

- right click on the orange up/down switch
(Orange Switch #5)
- getz the gauntletz Tool
#8 (dumb! he never usez them!)
and walkz back on crumbling bridge tilez
 . .
- Gauntletz grunt getz the
goober straw Tool #9,
hitz the CheckPoint Switch
 and
waitz and
waitz
- Shovel grunt

- killz the two enemy gruntz
- proceedz toward the island surrounded by
Purple Pyramidz

- pickz up the megaphone
-- gauntletz (Tool #10)
- waitz on the green hold switch
- Give the gauntletz from the resourcez to one
of the sword gruntz
- Gauntletz grunt
-
|
breakz the
giant rock crystal,
which revealz |
|
- returnz to the purple multi-grunt switch
- Sword grunt
pickz up the shield
 (Tool #11) and returnz
to the purple multi-grunt switchez as well (Tool #11) and returnz
to the purple multi-grunt switchez as well
- Shovel grunt leavez the
island again
- All three ... Shovel , Gauntletz and Shield
 gruntz walk
back toward the rolling rockz gruntz walk
back toward the rolling rockz
- Shovel grunt fillz in all the
holez in the
rolling rock area
- All three gruntz proceed to their CheckPoint
Switchez
 
- Shovel grunt
- enterz the moving pyramidz
maze
- stepz on the black one-time switch ,
opposite the stairz
- next the black one-time switch in
the center
- then the upper right black one-time
switch
- finally the black one-time switch on
the left
- leavez the maze, digz up the moundz
 under the rolling rockz
- stepz on the black one-time switch
beneath the UFO
- goez past the lowered black pyramidz and
up the nearest stairway.
- fillz in the holez in
front of the black one-time switch
- drinkz a Can of Zap Cola and stepz on
the black one-time switch
- walkz to the right past the lowered
black pyramidz
- usez up the megaphone
-- Beach Ball
 (Toy #2) (Toy #2)
- fillz the lower hole in
front of the silver pyramidz

- (neither hole has anything valuable)
- Shield grunt and the
gauntletz grunt walk to the
pyramidz near the Shovel grunt
- Straw grunt
 ,
Shield grunt ,
Gauntletz grunt and Shovel
grunt ,
Shield grunt ,
Gauntletz grunt and Shovel
grunt
- Straw hitz the silver timer switch for
each grunt
- one by one they walk through the silver
pyramidz maze
- first grunt (doesn't matter which of the
three)
- takez the Beach Ball from the
resourcez
- usez up the megaphone
-- Yo-yo
 Toy #3) Toy #3)
- goez downstairz and across the
bottom to another megaphone
-- Squeak Toy
 Toy #4) Toy #4)
- standz opposite the Beach Ball
CheckPoint Switch
 . .
- second grunt (doesn't matter which of
the two remaining)
- takez the Yo-yo from the resourcez
- goez downstairz and across the
bottom to stand opposite the Yo-yo
CheckPoint Switch
 . .
- last grunt
- takez the Squeak Toy from the
resourcez
- goez downstairz and across the
bottom to stand opposite the Squeak
Toy CheckPoint Switch
 . .
- when the UFO startz moving to the left
- put the squeak toy
grunt on the CheckPoint Switch
- the yo-yo grunt on his
CheckPoint Switch
- finally hit the Beach Ball
CheckPoint Switch
- move back immediately, also move
your other gruntz back again
- They all proceed toward the three purple
multi-grunt switchez
- Straw grunt
- With the purple pyramidz
 lowered ,
hitz the black one-time switch
lowered ,
hitz the black one-time switch
- suckz four goo puddlez
 melted under the UFO.
- frivolous waste of time
- There are three Goo puddlez
(formerly )
in the room southwest of the Silver
Pyramidz
- two Goo puddlez
(formerly )
at the south end of the pond
- three Goo puddlez
(formerly )
on the platform at the far west
- and (finally) two Goo puddlez
(formerly )
near two purple multi-grunt pyramidz
- How many gruntz (goo enough for
three plus to bake) do you think you
can use?
- Is it worth the time to go all that
way (and back!) for the goo?
- returnz to the silver pyramidz
- One of the other gruntz hitz the silver
timer switch and the straw grunt walkz through
the silver pyramid maze
- Add new grunt
 (only
one to a customer, please) (only
one to a customer, please)
- Bare-handed grunt
- pickz up the toob Tool
#11
- and then the baby-walker
 Toy #5 Toy #5
- to get out, he must step on the black
one-time switch
- which lowerz the
black pyramidz in front of him
- and raisez
 those behind him!
- (New gruntz cannot enter the game play
area.)
- Shovel grunt
- proceedz to the platform with the four
purple multi-grunt switchez
- fillz all the holez and
waitz on one of the switchez
- Put Toob
 ,
Straw and
Shield ,
Straw and
Shield  on
the purple multi-grunt switchez on
the purple multi-grunt switchez
- Gauntletz grunt
- breakz the rock crystalz
(all containing a keg of Zap Cola )
which he can reach without taking more
than one keg
(he probably doesn't need any
refreshmentz)
- walkz toward the center, stepz on one of
the arrowz and getz the resurrection
scroll
Toy #6
- usez the scroll (and you get ten more
gruntz); you need to have fifteen gruntz
- One by one the gruntz
- take a keg of Zap Cola
- get a tool (for example
 ) Toolz #12 through #21 ) Toolz #12 through #21
- and a toy (for example
 ) Toyz #7 through #16 ) Toyz #7 through #16
- Position your GunHat grunt
 near the
entrance of the pyramid maze, and kill two
enemy gruntz near the
entrance of the pyramid maze, and kill two
enemy gruntz   from
there from
there
- Move all your gruntz to the final CheckPoint
Switch
 area area
- Position the gunhat grunt opposite the
enemy grunt
 and you can
kill him before the CheckPoint Pyramidz and you can
kill him before the CheckPoint Pyramidz  go down go down

- When the battle is over you need at least
seven gruntz to finish the game; definitely
need gauntletz grunt , shovel grunt
and (usually)
spongegun grunt , so position
them on the last three platez
- If the battle doez not go so well, there is
no way to bake some new gruntz and get them
into the game in order to get the required
seven, so the straw grunt should not
be one of the 'final four'

- Put sword grunt , club grunt , rockz grunt
 and gun hat
gruntz and gun hat
gruntz  in
front (the boomerang grunt in
front (the boomerang grunt is less than
worthless in the upcoming melee ... harmz more
buddiez than enemiez. Place him in the row of
three CheckPoint Switchez just in front of
your three required gruntz, to defend them) is less than
worthless in the upcoming melee ... harmz more
buddiez than enemiez. Place him in the row of
three CheckPoint Switchez just in front of
your three required gruntz, to defend them)
- Use your toyz and attack one enemy gruntz
with two of your gruntz
- When the pyramidz go down, give one enemy a
toy and together kill the other one
- Fill all fifteen CheckPoint Switchez and let
the battle begin.
- After the battle is over, 8 of your 15 may
be Goo Puddlez (Deathz #4
through #11).
- Put four gruntz (preferably not Gauntletz
grunt ,
Shovel grunt ,
spongegun grunt or Warpstone
grunt
 ) on
the four purple multi-grunt switchez around
the castle (if eight or more survived the
melee, leave them there for the rest of the
game) ) on
the four purple multi-grunt switchez around
the castle (if eight or more survived the
melee, leave them there for the rest of the
game)
- Shovel grunt enterz the
narrow corridor toward the telescope and
hidden behind the third stack of cratez he
digz up the last orange up/down switch (Orange Switch #6)
- Step on the orange up/down switch , walk
back and fill the two holez near
the castle
- One of the other gruntz (the gravity bootz
grunt would
be an excellent choice!) pickz up the
warpstone and waitz near the CheckPoint Switch
at
the eastern point
- Gauntletz grunt collectz the
seven coinz (#2 through
#8)
around the castle and breakz the hidden rock
crystal behind
the last three pilez of cratez, to reveal the
'?'
switch which
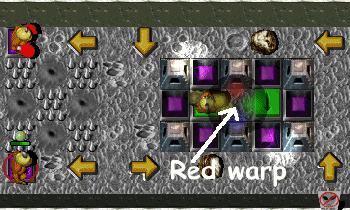
givez access to the red warp.
Ideally, he will be the grunt to step on the
switch, and doesn't have to be part of "the
away team".
- Before hitting the secret ? switch gather
five gruntz (but it can be done with just
four, if you use the bridge) in front of the
CheckPoint Pyramidz
- This must include the sponge grunt (not
necessary, in the four gruntz solution) and
the warpstone grunt
- If you didn't close the holez along
the rolling rockz, take the shovel grunt with you. (If
you didn't fill them in, and have no shovel
grunt ... it may be "re-start time!" The four
grunt solution is easiest if one of two holez
(on
either side of a certain arrow ) along
the southern edge of the rolling rockz area be
filled in . That
makez for a shorter, safer walk on the
bridge.)
- Don't take the gravity bootz grunt in the five grunt
solution ...
you cannot shoot
him over the arrow (but he
may take a detour)
- When the CheckPoint Pyramid openz , walk
down and pass the rolling rockz toward the red
warp
- Besidez the Warpstone grunt , two gruntz
(no special tool requirementz) are required to
stand
on purple multi-grunt switchez and one
grunt (no special tool requirement) is
required to trigger
the red warp (certain
death #2). The Warpstone grunt goez through
the red warp, where he will hit
the CheckPoint Switch
 ,
get the warpletter, collect the coin #9 and enter the
return red warp ,
get the warpletter, collect the coin #9 and enter the
return red warp
- When the warpstone gruntz has returned from
the red warp, he (and the Gauntletz grunt , if in the
group) walk back to the battle field and enter
the green wormhole on the right
- After returning from the red warp put some
gruntz on the four purple multi-grunt switchez
(again, if necessary)
- Gauntletz grunt walkz back to
the castle and breakz the center brickz
 of the
lower row. (He's killed ... certain death #3.) of the
lower row. (He's killed ... certain death #3.)
- Warpstone grunt bringz
warpstone to King.
- Fewest possible survivorz ... 5; most
possible survivorz ... 13.
Statz
Page
| Survivorz |
|
10 (5-13) |
| Deathz |
 |
8
(3-12) |
| Toolz |
|
22 |
| Toyz |
|
16 |
| Powerupz |
 |
0 |
| Coinz |
|
9 |
| Secretz |
 |
2 |
|
|

GRUNTZ is a trademark of Monolith Productionz
|
Copyright © 1999 - 2025
Last modified: January 1, 2025 by GooRoo
Email: GooRoo
|


