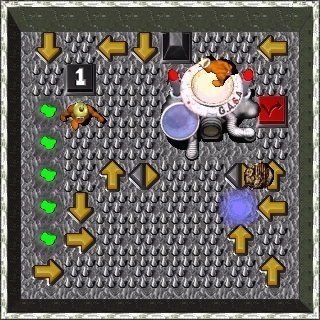
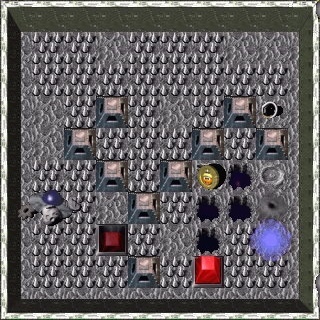
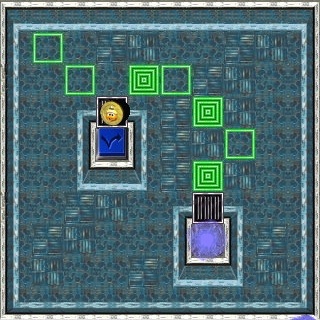
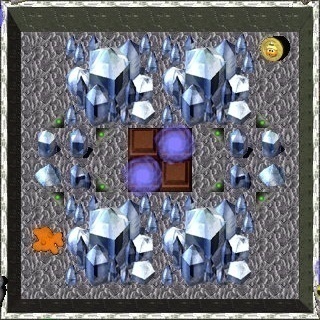
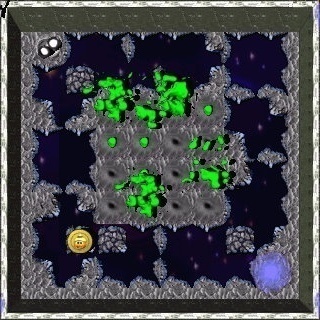
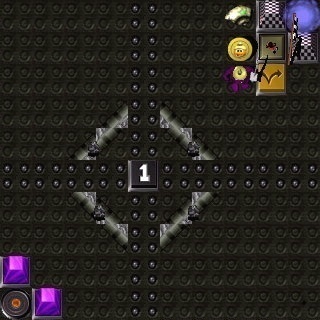
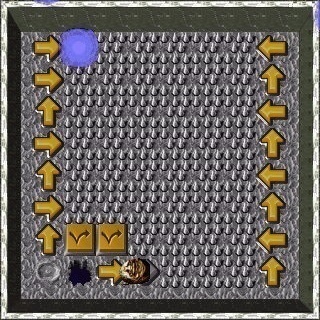
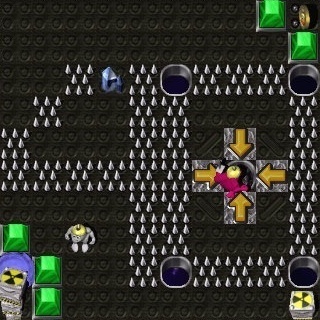
(a8)
1
One-Time
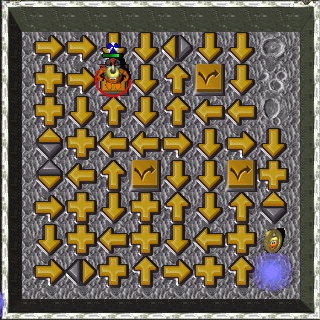
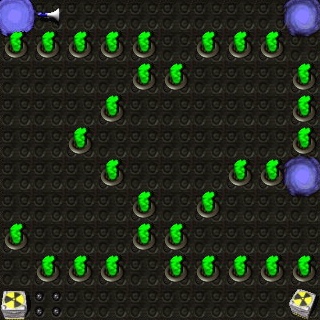
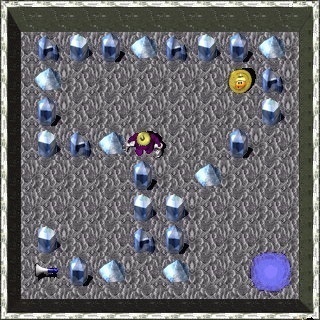
 the raised Black Pyramid
  (BP) in the path of the Rolling Rock
  .
.(a8)
Toggle
circlez around and crossez the Switch, reversing every Red Pyramid 
 (RP). Initially, they switch every 3.2 secondz.
If you alter its path, they switch approximately every 10 secondz.
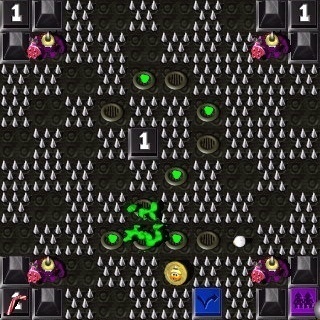
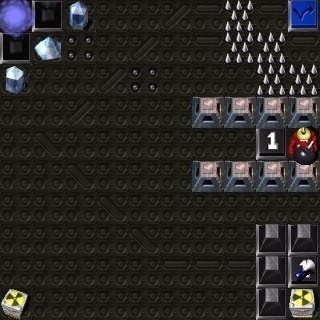
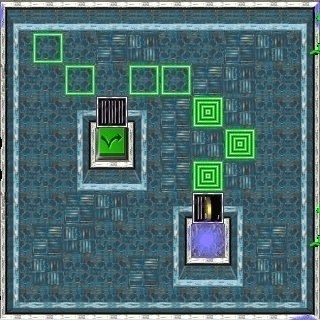
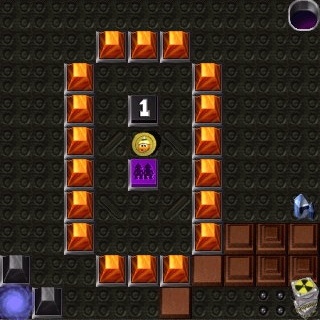
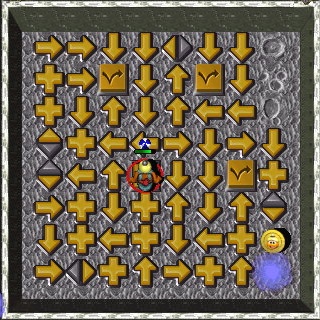
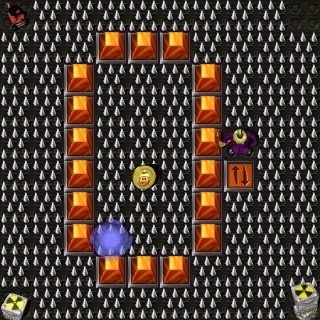
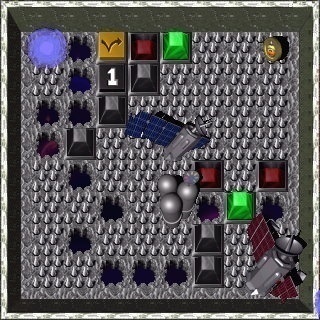
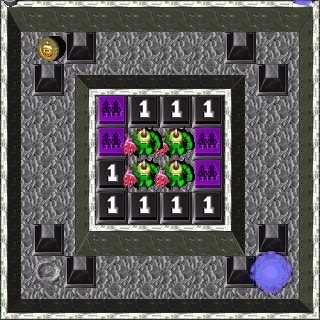
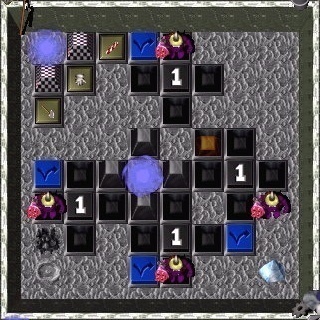
(c7)
2
One-Time
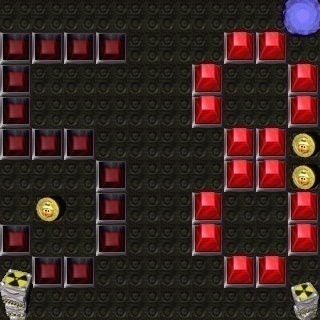
two raised BPz that were blocking access to another Black One-Time Switch  (BOTS) in the northeast corner.
(c7)
One-Time
two raised BPz that were blocking access to another BOTS in the southwest corner.Collect Coin
 #001 after pressing this Switch, and before reaching the next one.
(c7)
One-Time
two raised BPz that were blocking access to another BOTS in the northwest corner.(c7)
One-Time
two raised BPz that were blocking access to a Purple Multi-Grunt Switch  (PMGS) in the southeast corner.
Pick up a GooberStraw
 to speed the conversion of two more enemy Gruntz
  into something usable
  .
.
(c7)
Toggle
 one Toggled Bridge Tile
  (TBT) ... and lowerz three raised onez in d1.
Stay close to it, because it needz to be pressed a few more timez, reversing everything again.
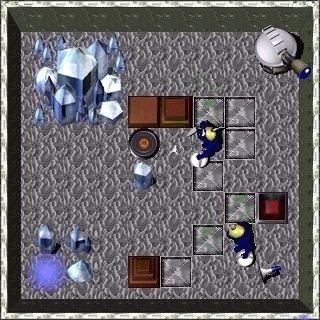
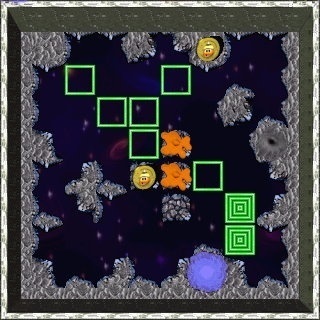
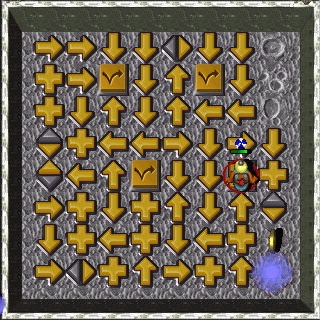
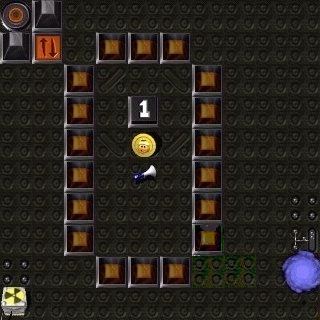
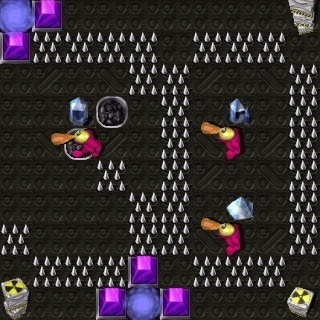
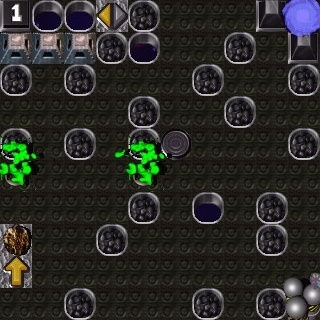
(a6)
3
Up/Down
 Grunt #2 enterz the game and usez a Megaphone
  to call for assistance
  .
.An Observatory hidez a Rock Crystal
 covering the Switch in a6.
Lowerz
 the associated raised Orange Pyramidz
  (OP) in the GOOROOSTOUR! square.
Raisez
 the associated Orange Up/Down Switch
  (OU/DS) in the GOOROOSTOUR! square.
Raisez
(via the associated OU/DS ) the associated lowered OPz in the GOOROOSTOUR! square.Collect three Coinz
#002, #003 and #004 before leaving this square with a Shovel  .
.

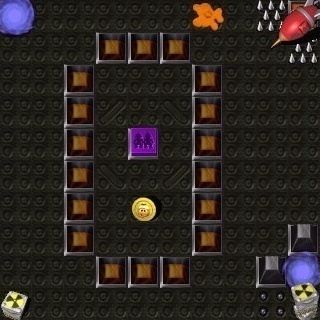
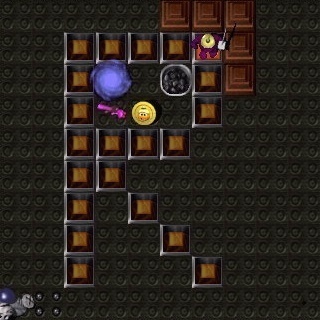
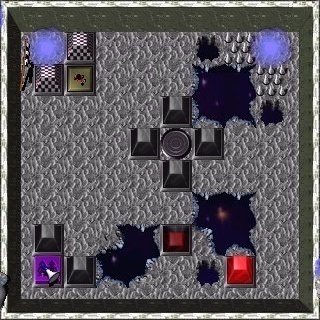
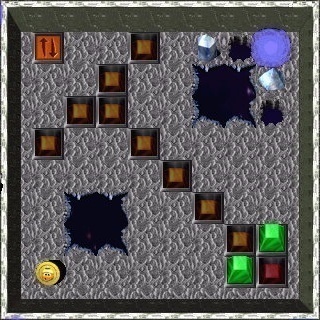
(b8)
4
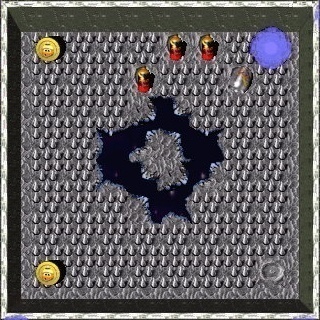
Toggle
 #2 digz up something
  to reveal his surroundingz
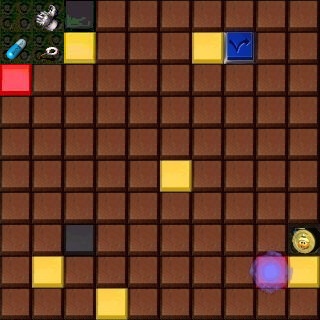
 ... and something else to do something about it!
The Switch raisez
 a TBT
a TBT  in the cratered gully in h1.
Collect Coin
#005 before leaving this square.
(d7)
5
Grunt #2 findz something  to bounce around in the square.
Collect Coin
#006 before leaving this square.
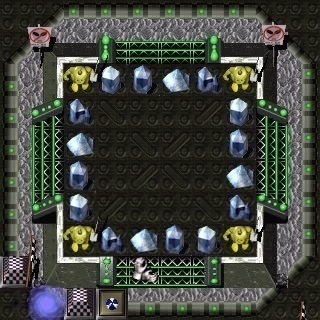
(c5)
6
One-Time
four raised BPz ... and raisez two lowered onez.
(c5)
Toggle
four TBTz raised by the Blue Toggle Switch  (BTS) in c7 ... and raisez one that was submerged (originally) in pool #1 (d1).
 Grunt #2 sayz "Slinky is not meant for travelling long distancez" ... so removez them.
(c5)
One-Time
two BPz raised by the previous BOTS .Collect Coin
#007 before leaving this square.
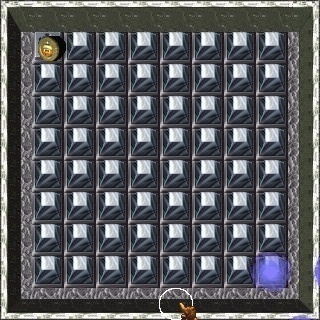
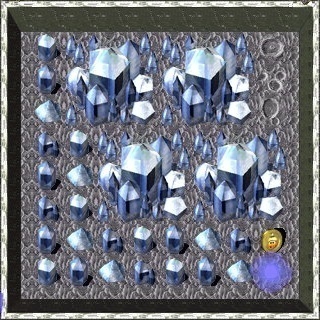
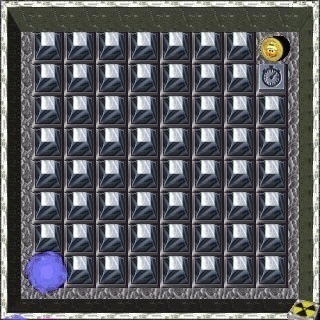
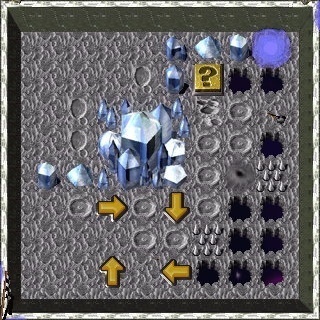
(a4)
7
Timer
 some of the Silver Pyramidz
  (SP) in the square.
Collect Coin
#008 upon arrival in this square.
(b2)
8
Point
Grunt #2 landz and sizez up the situation "I don't like this!" He seez possibilitiez on the stairway, so armz himself. He breakz a few thingz , then findz he has to break a head  as well, leaving a mess
  to clean up, a left-over Toy and revealing refreshmentz
 and cleaning toolz .
The Switch (CPS) lowerz
 two raised CheckPoint Pyramidz
  (CPP), allowing GooberStraw
  #2 access to the Blue Wormhole
  (BW).
(BW).Collect Coin
#009 before leaving this square.
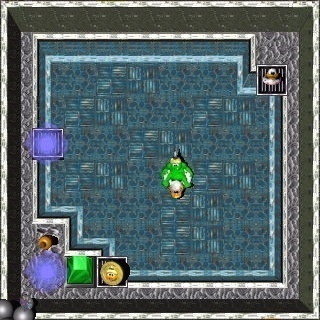
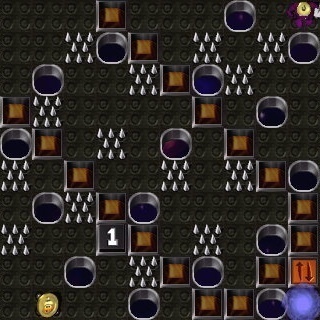
(d1)
9
Toggle
one TBT raised by the BTS in c5 ... and raisez two submerged onez in this pool (pool #1), and GooberStraw #1 helpz complete the Bridge to allow GooberStraw #2 to reach the BW .Collect Coin
#010 before leaving this square.
(c7)
Multi-
Grunt
(PMGS) required to satisfy two Purple Pyramidz  (PP) in b6 ... as long as the required Gruntz remain standing on them
  .
.(GooberStraw
#1 is the only choice to assign to this one.)
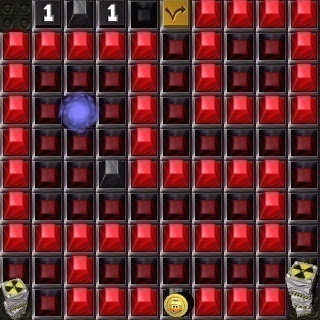
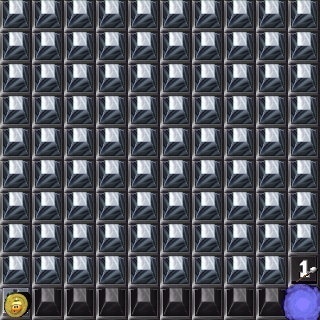
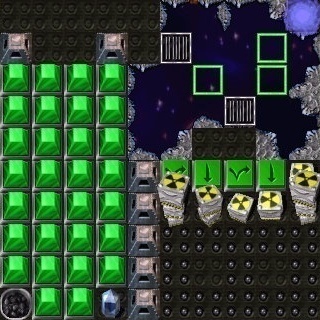
(c3)
10
One-Time
two raised BPz .(c3)
One-Time
a raised BP ... and raisez one that was just lowered.Collect Coin
#011 before leaving this square.
(c3)
Toggle
 a Two-Way Arrow
  (TWA) in the path of the Rolling Rock , changing the time between changez of RPz from 3.2 secondz to 10 secondz.
(If you press the Yellow Toggle Switch
 (YTS) again approximately two secondz after a change, it will revert back to 3.2 secondz between changez.
You decide if that is a good thing ... or not!)
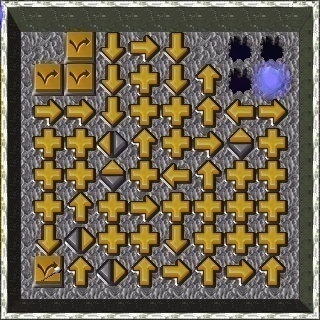
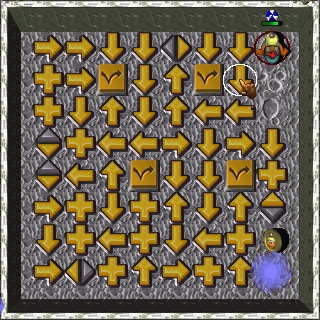
(a2)
11
Toggle
 of the TWAz
  in the maze.
(a2)
Toggle
two of the TWA(z) in the maze.(Just because you see a Switch, that doesn't mean you have to press it!)
(a2)
Toggle
four of the five TWAz in the maze.(Just because you see a Switch, that doesn't mean you have to press it!)
(a2)
Toggle
two TWAz that were reversed by another YTS .Collect Coin
#012 before leaving this square.

(c1)
12
Toggle
 (one of seventeen!) where there are also six Holez
  .
.This Switch is pressed once by Shovel
#2, since the enemy Grunt  will never touch it.
Submergez
a raised TBT ... raisez it if it was submerged in pool #2 (d3), and togglez a Green Pyramid 
 (GP) in the square with the well-protected enemy Grunt
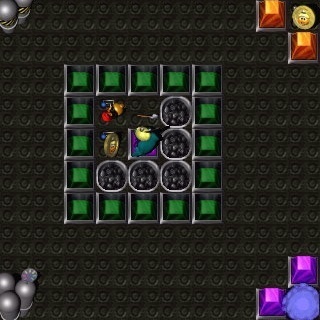
While digging around, he uncoverz an illicit supply of drugz ... and popz the pillz!
(c1)
Toggle
(one of seventeen!) where there are also six Holez .This Switch is a real work-horse, repeatedly pressed by an enemy Grunt
.Submergez
one raised TBT ... and raisez one submerged one in pool #2.Also reversez the statez of three TBTz
in the cratered gully in the corner, and some in the cratered gully in the interior.It togglez GPz
in the spiral of e7, five in the square with the well-protected enemy Grunt 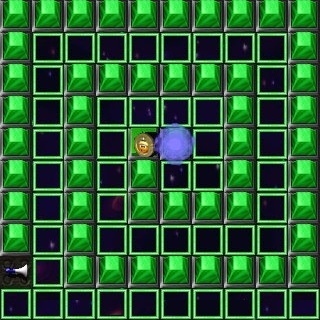 and one in square h7.
(c1)
Toggle
(one of seventeen!) where there are also six Holez .This Switch is a real work-horse, repeatedly pressed by an enemy Grunt
.Submergez
one raised TBT ... and raisez one submerged one in pool #2.Also reversez the statez of two TBTz
in the cratered gully in the corner, and some in the cratered gully in the interior.It togglez GPz
in the spiral of e7, five in the square with the well-protected enemy Grunt and one in square h7.
(c1)
Toggle
(one of seventeen!) where there are also six Holez .This Switch is a real work-horse, repeatedly pressed by an enemy Grunt
.Submergez
one raised TBT ... and raisez one submerge one in pool #2.Also reversez the statez of three TBTz
in the cratered gully in the corner, and some in the cratered gully in the interior.It togglez GPz
in the spiral of e7 and five in the square with the well-protected enemy Grunt .Collect three Coinz
#013, #014 and #015 before leaving this square.
(d3)
13
Toggle
two raised GPz in the GOOROOSTOUR! square.Collect Coin
#016 before leaving this square.

(f2)
14
Multi-
Grunt
required to satisfy two PPz in b6 ... as long as the required Gruntz remain standing on them . (Shovel #2 should be assigned to this one.)Four
Gruntz are resurrected and restored to full health in this square.Three of the new
Gruntz (#3, #4 and #5) will leave the square, two with Toolz.Collect Coin
#017 before everyone leavez this square.
(h1)
15
Collect two Coinz
#018 and #019 before leaving this square.
(g3)
16
Up/Down
when the associated OU/DS was depressed in a6.Lowerz
the associated raised OPz in the GOOROOSTOUR! square.Raisez
the associated OU/DS under the Observatory in a6.Also raisez
the associated OU/DS in the GOOROOSTOUR! square.Collect Coin
#020 before everyone leavez this square.
(e2)
17
Collect two Coinz
#021 and #022 before leaving this square.
(g1)
18
Up/Down
 which TimeBombz
  #3 blew up.
Lowerz
the associated raised OPz in the GOOROOSTOUR! square (g1).Raisez
the associated OU/DS in the GOOROOSTOUR! square.
(g1)
One-Time
two raised BPz blocking access to the exit BW .Collect Coin
#023 before leaving this square.
(h3)
19
Toggle
Grunt #3 blowz up a Giant Rock Crystal
        
|
revealing the YTS in the middle (with a TimeBomb  on it!) starting a chain reaction toward the west. on it!) starting a chain reaction toward the west.Want to see the end result of the chain reaction? |
   
|
 three TWAz .

(h3)
Toggle
|
|
revealing the YTS in the middle (with a TimeBomb on it!) starting a chain reaction toward the west. |
 
|
two TWAz .
(h3)
Toggle
Grunt #3 blowz up a Giant Rock Crystal
|
|
revealing the YTS in the middle (with a TimeBomb on it!) starting a chain reaction toward the southwest. |

|
one TWA .
(h3)
Toggle
|
|
revealing the YTS in the middle (with a TimeBomb on it!) starting a chain reaction toward the southwest. |
|
three TWAz ..Want to see the end result of pressing the Switch?
Collect Coin
#024 before leaving this square.
(f4)
20
Up/Down
when the associated OU/DS was depressed in GOOROOSTOUR! (g3).Lowerz
the associated raised OPz in the GOOROOSTOUR! square ... and raisez lowered onez in the GOOROOSTOUR! square.Raisez
the associated OU/DSz in the GOOROOSTOUR! square and in the GOOROOSTOUR! square.Collect Coin
#025 before leaving this square.
(h5)
21
Collect Coin
#026 before leaving this square.
(f6)
22
Up/Down
when the associated OU/DS was depressed in GOOROOSTOUR!.The OPz
in this square were lowered (by association), so should you press this Switch? Decisionz, decisionz! (I wouldn't press it, if I were you.)Lowerz
the associated raised OPz ... and raisez lowered onez.Raisez
the associated OU/DSz in GOOROOSTOUR! and in GOOROOSTOUR!.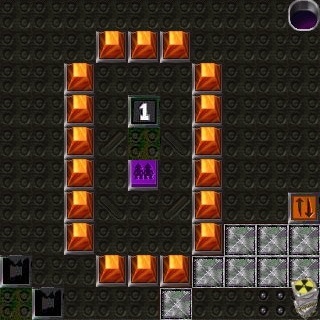
Collect Coin
#027 before leaving this square.
(e4)
23
Multi-
Grunt
 Grunt #3 landz on a Megaphone on this Switch and callz for a Tool.
This is the third of six PMGSz
required to Lower  two PPz in b6 ... as long as the required Gruntz remain standing on them .
Another PMGS
in GOOROOSTOUR! could be reached earlier, but is doubtful an enemy Grunt would allow the Grunt to remain on it ... and the Grunt in GOOROOSTOUR! and the  Grunt in GOOROOSTOUR! have other taskz before it is time to just "stand around", so this is #3 and after neutralizing the enemy, the one in GOOROOSTOUR! will be occupied.
Right now, two BPz
prevent Gravity Bootz #3 from moving, so he standz there.Meanwhile (back at the ranch ... er, the birthplace of
 Grunt #7), he doez a little work.
Shovel Grunt #8 will dig up Coin #028 atop a Question Mark Switch
Grunt #7), he doez a little work.
Shovel Grunt #8 will dig up Coin #028 atop a Question Mark Switch  in this square.
(e4)
Mark
Switch
 which becomez a Mound
  in the southern edge of the square.
Sssshhh! It's a Secret!
(b6)
One-Time
Grunt enterz the game in the square with the Warpstone piece  , on the GruntCreationPad
  , and enticez the enemy
  Grunt there into pressing the Switch.
Lowerz
raised BPz in the birthplace of Grunt #8).
(g5)
24
One-Time
two raised BPz in the GOOROOSTOUR! square.Lowerz
two raised BPz trapping Gravity Bootz Grunt #3 in the birthplace of Grunt #8).
(h7)
25
Toggle
... but the Rolling Rock in a8 is still ... rolling!Gravity Bootz
Grunt #3 will collect Coin #031 on the way to the next Switch.
(h7)
Toggle
the TWA in the King's Fortress square, which changez the duration of RPz from approximately 10 secondz (good) to about 3.2 secondz (bad).Gravity Bootz
Grunt #3 should step on it again (10 secondz, good for digging), and either Shovel Grunt #8 or Gauntletz  Grunt #3 should step on it once more (3.2 secondz) before leaving the area. (You will be thankful you did when you get back 'home'.)
(h7)
One-Time
five raised BPz , allowing Shovel Grunt #8 access to many Holez .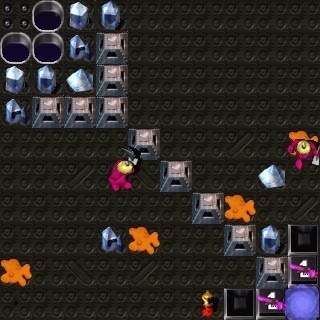
(f8)
26
One-Time
the lowered BP behind the Grunt that stepz on it, preventing any action except going through the BW .(f8)
One-Time
the lowered BP behind the Grunt that stepz on it, preventing any action except going through the BW .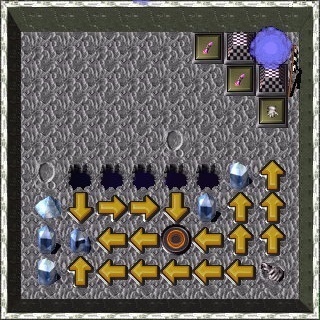
(e6)
27
Point
two raised CPPz .(e6)
Point
two raised CPPz .(e6)
Point
two raised CPPz .
(g7)
28
Up/Down
the associated raised OPz ... and raisez lowered onez.Raisez
the associated OU/DS in GOOROOSTOUR!
(e8)
29
One-Time
Grunt #8 'encouragez' an enemy Grunt to step on the Switch.Lowerz
one raised BP so SpongeGun Grunt #8 has room to maneuver.
(e8)
One-Time
Grunt #8 'encouragez' an enemy Grunt to step on the Switch.Lowerz
one raised BP so SpongeGun Grunt #8 has room to maneuver.
(e8)
One-Time
Grunt #8 'encouragez' an enemy Grunt to step on the Switch.Lowerz
one raised BP so SpongeGun Grunt #8 has room to maneuver.Collect Coin
#041 at this time.
(e8)
One-Time
Grunt #8 'encouragez' an enemy Grunt to step on the Switch.Lowerz
one raised BP so SpongeGun Grunt #8 has room to maneuver.
(e8)
One-Time
Grunt #8 'encouragez' an enemy Grunt to step on the Switch.Lowerz
one raised BP so SpongeGun Grunt #8 has room to maneuver.
(e8)
One-Time
Grunt #8 'encouragez' an enemy Grunt to step on the Switch.Lowerz
one raised BP so SpongeGun Grunt #8 has room to maneuver.
(e8)
One-Time
Grunt #8 'encouragez' an enemy Grunt to step on the Switch.Lowerz
one raised BP so SpongeGun Grunt #8 has room to maneuver.
(e8)
One-Time
Grunt #8 'encouragez' an enemy Grunt to step on the Switch.Lowerz
one raised BP so SpongeGun Grunt #8 has room to maneuver.
(e8)
Multi-
Grunt
Grunt #8 'encouragez' an enemy Grunt to stand on the Switch.One of two, lowerz
two PPz in the square with Spikez  arranged as "30",
as long as the required Gruntz remain standing on them
.
(e8)
Multi-
Grunt
Grunt #8 'encouragez' an enemy Grunt to stand on the Switch.One of two, lowerz
two PPz in the square with Spikez arranged as "30",as long as the required Gruntz remain standing on them
.
(e8)
Multi-
Grunt
Grunt #8 'encouragez' an enemy Grunt to stand on the Switch.One of two, lowerz
three PPz in the square with Spikez arranged as "30",as long as the required Gruntz remain standing on them
.
(e8)
Multi-
Grunt
Grunt #8 'encouragez' an enemy Grunt to stand on the Switch.One of two, lowerz
three PPz in the square with Spikez arranged as "30",as long as the required Gruntz remain standing on them
.
(d6)
30
Collect two Coinz
#042 and #043 before leaving this square.
(b5)
31
Up/Down
any associated raised OPz ... and raisez any lowered onez in GOOROOSTOUR!.Raisez
the ten associated OU/DS , which togglez all of the OPz associated with them!
(d4)
32
Collect two Coinz
#045 and #046 before leaving this square.
(f3)
33
One-Time
four BPz ... which you do not want raised!(f3)
One-Time
four BPz ... which you do not want raised!(f3)
One-Time
four BPz ... which you do not want raised!(f3)
One-Time
four BPz ... which you do not want raised!(f3)
Toggle
submerged TBTz (submergez raised onez) ... press odd number of timez.(f3)
Toggle
submerged TBTz (submergez raised onez) ... press odd number of timez.(f3)
Toggle
submerged TBTz (submergez raised onez) ... press odd number of timez.(f3)
Toggle
submerged TBTz (submergez raised onez) ... press odd number of timez.(f3)
Point

 , lowerz two raised CPPz .
(f3)
Point
 , lowerz two raised CPPz .
(f3)
Point
, lowerz two raised CPPz . Exit like this.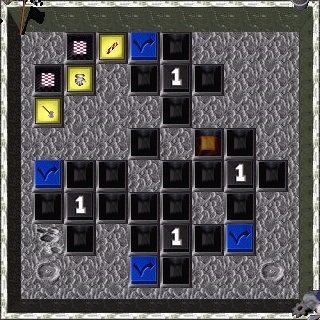
(e1)
34
Hold
in this square.Reversez
TWA(z) ...as long as a Grunt remainz standing on it
 .
.
(e1)
One-Time
two raised BPz ... and raisez one lowered one.(Yes, you must locate the hidden BP
before the switch is activated!)
(g2)
35
Mark
Switch
which becomez a Mound in this square.Sssshhh! It's a Secret!
(g2)
Toggle
the TWA . (It's a red herring!)(g2)
Toggle
the TWA . (It's a red herring!)
(e3)
36
Point
two raised CPPz ... and raisez two lowered onez.(e3)
One-Time
two raised BPz ... and lowerz four four raised BPz nearby.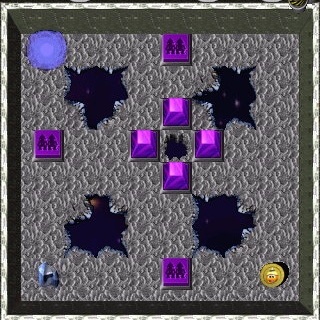
(f1)
37
Multi-
Grunt
four PPz ...as long as the required Gruntz remain standing on them
.
(f1)
Multi-
Grunt
four PPz ...as long as the required Gruntz remain standing on them
.
(f1)
Multi-
Grunt
four PPz ...as long as the required Gruntz remain standing on them
.
(f1)
Mark
Switch
in the southwest corner of the square.Sssshhh! It's a Secret!
(h2)
38
Timer
some of the Silver Pyramidz (SP) in the square, to provide a path to the BOTS ... and to briefly display "38" within the square.(h2)
One-Time
eight raised BPz .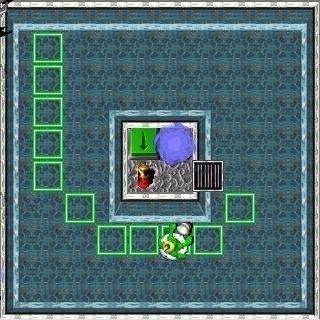
(g4)
39
Hold
two raised GPz ... as long as a Grunt remainz standing on it  .
.
(e5)
40
Toggle
pointed to by four Arrowz ... possibly with an enemy  Grunt doing a strange two-step around it.
Lowerz
three raised GPz ... and raisez them if they are lowered .
(c6)
41
Timer
some of the Silver Pyramidz (SP) in the square, to briefly display '4' '1', and then provide a path to the Blue Wormhole .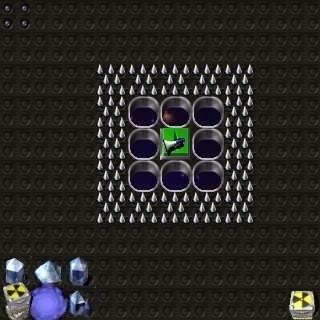
(a7)
42
Hold
two raised GPz ... as long as a Grunt remainz standing on it .Allowz the Grunt standing on a companion switch three movez back to re-join the team.
(c8)
43
Just collect a Coin
#066 and acquire a Tool  in this square.
(e7)
44
Hold
opened Bridge Tilez ... as long as a Grunt remainz standing on it .
(g8)
45
One-Time
five raised BPz .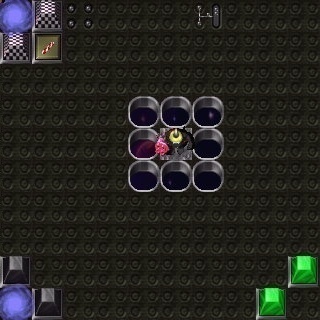
(h6)
46
Point
two raised CPPz .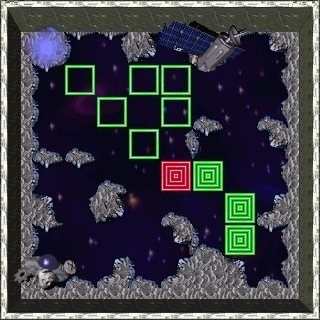
(f5)
47
Up/Down
Lowerz
the associated raised OPz ... and raisez lowered onez inGOOROOSTOUR!, GOOROOSTOUR!, GOOROOSTOUR! and GOOROOSTOUR!.
Togglez
the associated OU/DSz in those same squarez.
(h4)
48
One-Time
two raised BPz in GOOROOSTOUR!.(h4)
Up/Down
the associated raised OPz in ten different squarez ... and raisez any that are lowered !Togglez
the associated OU/DSz in those same squarez.
(g6) 49
Mark
Switch

(h8)
50
One-Time
two raised BPz to allow SpongeGun Grunt #9 to re-join the team.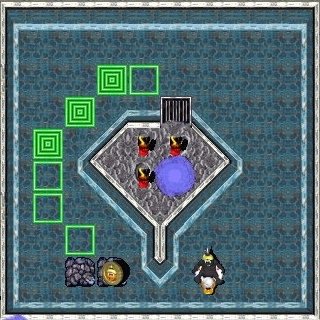
(f7)
51
Just collect a Coin
#076 and acquire a Tool in this square.(d8)
52
Multi-
Grunt
two PPz ... as long as any Grunt remainz standing on it .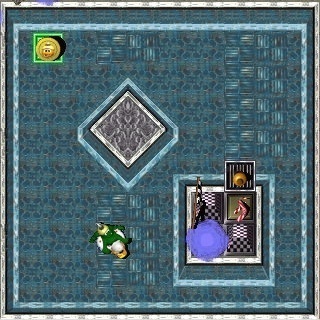
(b7)
53
Point
two raised CheckPoint Pyramidz (CPP).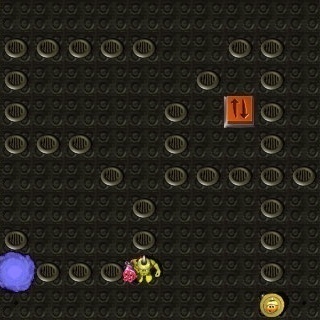
(a5) 54
Up/Down
the associated raised OPz in ten different squarez ... and raisez any that are lowered !Togglez
the associated OU/DSz in those same squarez.
(c4)
55
Just collect two Coinz
#082 and #083 (losing some health), puncture two Toobz and regain some health  in this square.

(a3) 56
Up/Down
the associated raised OPz in ten different squarez ... and raisez any that are lowered !Togglez
the associated OU/DSz in those same squarez.
(b1)
57
Just collect a Coin
#085 and use a Megaphone in this square.
(d2)
58
Point
four raised CPPz .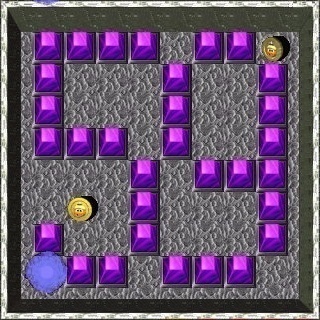
(b3)
59
Point
four raised CPPz .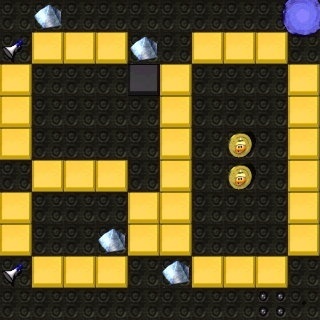
(a1)
60
Point
a raised CPPz .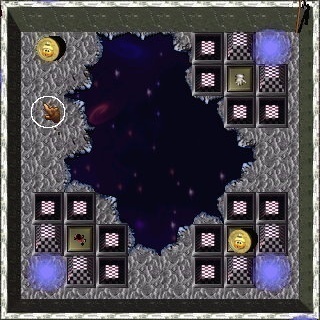
(c2)
61
Point
two raised CPPz ... and raisez four lowered onez.(c2)
Point
two raised CPPz ... and raisez eight lowered onez ...four of those around a teammate's CPS
 .
.
(c2)
Point
two raised CPPz ... and raisez twelve lowered onez ...four of those around one teammate's CPS
...and four of those around another teammate's CPS
!
(b4)
62
Toggle
some raised GPz ... and raisez some lowered onez.(b4)
Hold
some raised GPz ... and raisez some lowered onez ...as long as a Grunt remainz standing on it
.
(b4)
Toggle
some raised GPz ... and raisez some lowered onez.(b4)
Hold
some raised GPz ... and raisez some lowered onez ...as long as a Grunt remainz standing on it
.

(d5)
63
Collect two Coinz
#098 and #099 in this square.
(b6)
64
Toggle
the TWA at the southeast corner of the King's Fortress, either trapping the Rolling Rock if its round-trip is 3.2 secondz (making it no longer a hazard), or altering its interval from 10 secondz to 8 secondz per round-trip (making it more hazardous).See the YTS
in the RPz maze, and the YTS in the Satellite gully so see where you may have gone wrong.
(b6)
Point
raised CheckPoint Pyramidz (CPP) ... and raisez lowered onez.Collect Coin
#100 before leaving this square.