 #1
#1 (Toy #1), decide you have no time to play, and set it down again ... somewhere useful. See if you can't make friendz with the Gruntz
 around you.
If he
provez to be unfriendly, point him in the right direction 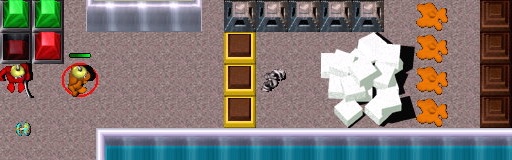 ... and plug your earz.
Try again with the next Grunt
, pointing him to some work 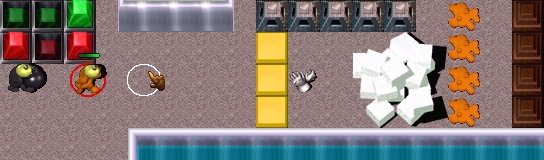 to be done.
Is there anything else you can do around here?
Pick up a Tool
 (Tool #1) you can now reach.
 #1
#1        
|
leading to a scattered pile of Sugar Cubez. |   
|
to uncover something useful  (Toy #2, which you save for later).
Continue breaking Sugar Cubez
, pocketing anything valuable  (Coinz #5 and #6), leaving everything else
 (Toyz #3 and #4) for someone else to use.
When there is nothing left you can reach to break, without picking up something you don't know you want, pull out the Magic Paper and start reading.
Four nearby Goo Puddlez
 bubble and pop up into dazed-looking Bare-handed Gruntz. Yay, team!
#2 and pick up a Yo-yo (Toy #3) ... and some "dangerous ordinance"
bubble and pop up into dazed-looking Bare-handed Gruntz. Yay, team!
#2 and pick up a Yo-yo (Toy #3) ... and some "dangerous ordinance"  and mumble something about "I'm really gonna light this thing!".
Find a place to stand as far away from any Brickz
 as possible ... and wait ... patiently. #3 and pick up a Yo-yo (Toy #4).
Find a place to stand as far away from any Brickz
as possible ... and wait ... patiently. #4 and pick up a Sword (Tool #2). #5 to turn up. #4
#4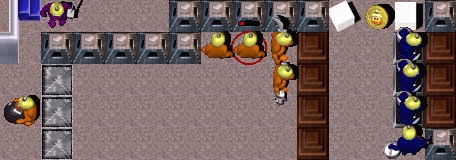 #1, near some Brickz
  ... and waitz. #4 and
Gauntletz
#1 to the east ... but they didn't start out like that!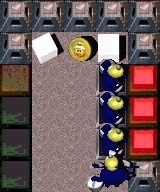
Some of them have a deadly base layer
 that four industrious typez
  have added two layerz to, disguising what they really are. When they finished there, they did some work on the Brickz further east creating three more stackz .
What should you do in potentially hazardous situationz? Right ... SAVE!
Those guyz will slap down Brickz
 almost as fast as you can break them.
Solution? Bash the enemy gruntz
back into their basic state!  How?
How?Sword
#4 is ready to pounce, while Gauntletz #1 is breaking Brick stackz (pick the correct one, please) down to their base  .
.When Gauntletz
#1 revealz a Foundation Tile , Sword #4 stepz in for some "slice and dice" ... then stepz back out again to avoid retribution.Repeat until all four enemy Gruntz
are nothing but Goo .Here's a hint: you will never acquire a GooberStraw
 to suck them up.
It doesn't matter where their remainz fall ... even all in the same place. Stick it
to them! #1 #4 is done carving, it is time to break more stuff!What should you do in potentially hazardous situationz? Right ... SAVE!
Start with a couple of Sugar Cubez
 , and pocket a Coin (Coin #7).
(Bare-handed
Grunt #5 getz the Keg of Zap Cola ... his health was bad.)Reduce a Brick stack to a safe minimum, and let someone else reduce them further.
 #5 in the area.
When that doesn't work, you do a quick one-step, 'cause "the fuse is lit"!
The result is the removal of a "short stack" of deadly
 Brickz.
Alwayz the peacemaker, you try one more time to be friendly. No dice!
The last guard
in the area lightz up, and yellz something unintelligible.
#1, and get help to remove the rest.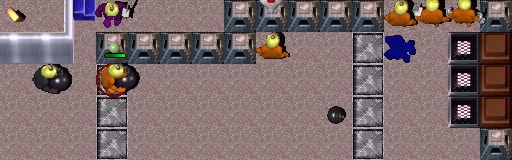
Finish the job, removing
the bottom (safe) layer, to move freely in the area.Break one last Sugar Cube
... and step away from that ticking sound!Pick up the Scroll
(Toy #5) and take another reading test.Four nearby Goo Puddlez
and one to four Goo Puddlez of a different color bubble and pop up into dazed-looking Bare-handed Gruntz ( ).
).You can probably ignore the one(z) that won't come when you call ... too dazed to fight.
Pick up a Coin
(Coin #8) and break safe layerz of all the Brickz you can reach.
#8. #9.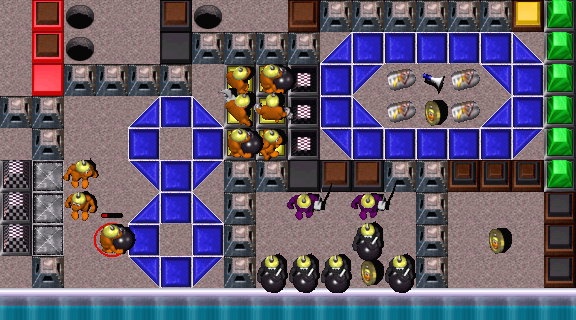


 (CPS) ahead of you.
(The Designer usez Gruntz
#1, #2, #3, #4, #5 and #6.)Bare-handed
Gruntz in bad health each down a Keg of Zap Cola and move far to the southwest ... where they are not a distraction for short-tempered enemy Gruntz .Gauntletz
#1 (avoidz the remaining Kegz of Zap Cola and) pickz up a Coin (Coin #7), and usez a Megaphone  to call for a Tool.
(Grunt #5 takez it
 (Tool #3), when it arrivez, becoming Shovel
  Grunt #5.)
Then Gauntletz
#1 movez around the room and breakz everything he knowz is safe to break.Status check: does anyone with a Bomb
also have a Toy?Set it down for someone else to pick up (or some place useful).
Everyone (except Gauntletz
#1 and Bomb  #9) move southwest (out of the way). #9 (Death #1 ... no Goo left behind). (Remember him reverently.)
#1
#9) move southwest (out of the way). #9 (Death #1 ... no Goo left behind). (Remember him reverently.)
#1 (who pickz up a Toy and startz playing with it), and repeatz the maneuver with the other one.
Stepz close enough to the (unoccupied
 ) guardz to lure one of them out and pointed in the right direction. (One down, six to go.)
Moving quickly (and efficiently) he goez back for one more. (Two down, five to go.)
There should now be four more Brickz
it is safe to break. Do it!
#5,Sword
#4 andGauntletz
#1
That Grunt should approach one of the well-armed enemy Gruntz
and give it to him.Then all three Gruntz gang up to "give it to him" in a different way!
 (Three down, four to go.)
One of the three probably got 'nicked' ... and should down any leftover Zap Cola
.Join forcez once again against the other well-armed enemy Grunt
, and the Grunt who getz 'nicked' will just have to "grin and bear it". (Four down, three to go.)Sword
#4 and Gauntletz #1 move out of (potential) harm's way.Shovel
#5 lurez one of the three remaining guardz out, to remove other obstaclez  , leaving something safe for Gauntletz #1 to break. (Five down, two to go.)
Shovel
#5 fillz in Holez  , digz up Moundz
  and pocket a few Coinz (Coinz #25, #26, #27, #28, #29 and #30), while playing "leap frog" with Gauntletz #1 and an occasional enemy Grunt from that well-guarded room.
Gauntletz
#1 doez his part by breaking 'safe' Brickz and the top layerz of "not so safe" Brickz  .
.Enemy Gruntz
are 'enlisted' to take care of the rest of the "not so safe" Brickz  .
.While Shovel
#5 'hidez', Gauntletz #1 goez back and "openz the door" of the room to the far east, and bringz more guardz out (one at a time) to remove more obstaclez 
 to the "central vault" (the King's Fortress), then removez the 'safe' Brickz underneath.
When that "super duper pooper scooper" is no longer of use, Shovel
#5 can pick up several of the dangerous objectz (you shouldn't have to use any of them  ).
#5 (Coin #11) in that (previously) well-guarded room.
).
#5 (Coin #11) in that (previously) well-guarded room.You get that "floating feeling" as a wormhole
 (Red Warp (RW) #2) openz up under you!
You land on something kinetic ... a set of Springz
 (Tool #4)!
 #5
#5 Tilez) to make your way to the way back home, acquiring six Coinz (Coin #19, #20, #21, #22, #23 and #24) along the way.
Each Coin is associated with a Blue Toggle Switch
 , which affectz Bridge tilez
 .
.Pay attention to what happenz when you jump on them!
(You also lose those Springz
on a Spikez  tile before you reach the return RW ). #5 (Toy #8).
Pick up the Coin
(Coin #11), and "deja vu!" ... another RW (#3) takez you away.You land on a (thankfully, raised) Bridge tile
in the pool of water you just left.You make your way from 'Z' through 'T' to 'N', picking up three Coinz
(Coinz #19, #20 and #21).Then you discover a Sword
(Tool #5) on the 'U', and arm yourself.The 'U' also yieldz a Coin
, as do the 'R' and the 'G' (Coinz #22, #23 and #24).Before you reach the return RW
), you pick up the Warp letter  .
#5 #4 and Gauntletz #1, near the King's Fortress. #1,
.
#5 #4 and Gauntletz #1, near the King's Fortress. #1,Sword
#4,Sword
#5 andBomb
#?
- Gauntletz #1 breakz the center Brick , and the Grunt with the Bomb makez a kamikaze run at the center Gold Brick
 ... with luck, the enemy gruntz come out and are caught in the explosion.
 - Gauntletz #1 breakz two Brickz , and the Grunt with the Toy givez it to one of the enemy Gruntz and both Sword Gruntz slice up the other one . Then they turn their "tender merciez" on the one playing around.
#? and Gauntletz #1 (or two Bomb Gruntz #? and any other Grunt) surviving.(The Designer has had five survivorz ... but missed a Secret.
 )
)With the opposition all puddled up
(or disintegrated), a Bomb Grunt #? takez out (took out?) the Gold Brickz and Gauntletz #1 breakz everything breakable.Pick a Grunt, any Grunt, and send him after the Coin
(Coin #31), the Warp letter  and the Warpstone Piece
  .
.
 #? to the King! Success!
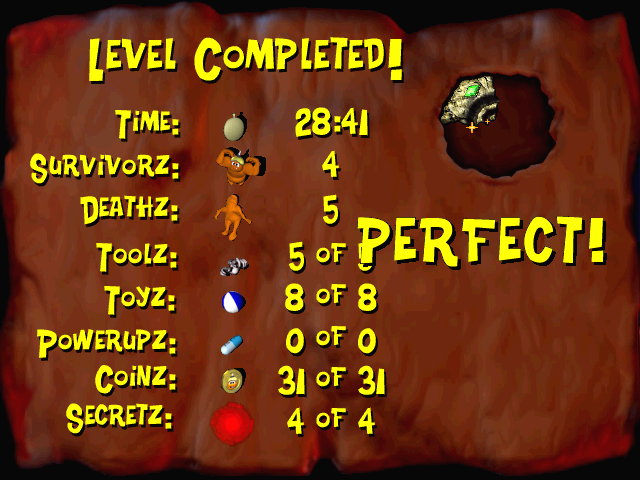