 #1
#1 headz your way with mayhem in mind ... so go on the attack! He is stronger than you, so use "hit and run" tacticz ... hit, then run toward the Can of Zap Cola
  , but don't drink any until your health is in the red. Continue with "hit and run", this time toward a Bottle of Zap Cola
  . Repeat once more, and if you were very good at this, your health might be in the yellow ... but more likely to be in the red. But you will be standing next to a Black Goo Puddle
  with the enemy Grunt's Tool
  floating in it. Pick it up!
 #1
#1Take a moment to look around ... the only way to go is south.
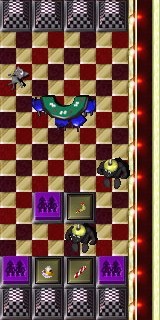
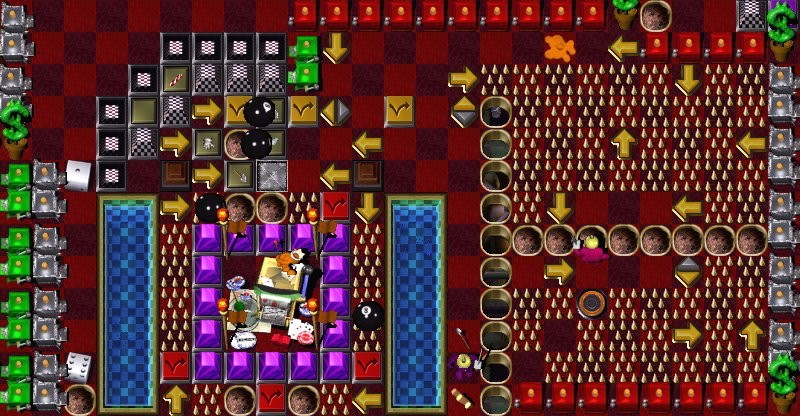
You see what awaitz you in Room #2 ... three enemy Gruntz


 !
!There is a Keg of Zap Cola
 and a Can of Zap Cola ... those will come in handy.
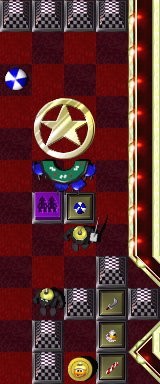
There is a Black One-Time Switch
 (BOTS) probably needed to lower
  the two Black Pyramidz
  (BP).
(BP).There is also a Question Mark Switch
 (QMS) blocked by the two BPz .
There is a Toy
 that you will want to pick up ... and give away as a distraction.
The most important thing you can see is a Picket Sign
 ... surrounded by three Construction Pyramidz
  (CP).
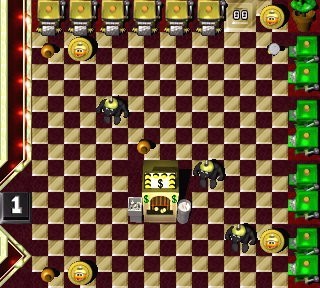
(CP).There is only one of you ... and three of them.
There are also three Purple Multi-Grunt Switchez
 (PMGS).
(Important, but they can wait until much later).
Your real task is to place three Gruntz

 (you seem to be 'short' at least two!) onto three CheckPoint Switchez

 (CPS).
You know how that Picket Sign works, right? Hold it, and one touch makez an enemy your friend.
Time is also your enemy, you lose health with time ... gain health by making friendz.
You want to avoid (as much as possible) getting hurt by "enemy action".
Since you have to touch an enemy, you cannot avoid everything.
The guy with the "bent piece of wood"
 is your biggest threat. Can you distract him?
The next guy is weaker than you (right now), so you can handle him all by yourself.
The third guy is furthest away, so is your least concern.
Paddle over to Room #2, and past your main enemy
(he waitz for you to stop).When he windz up to throw ... move! Pick up either the refreshmentz, or the Toy ... and move!
Whichever you left behind is your next target. Pick ... and move!
(Designer's choice ... refreshmentz
first, then Toy .)Waddle over onto the CPS
, and when he throwz, step onto the Landing Dock  .
.Let him play with the Toy while you step on the BOTS
and attack the weakest Grunt .No fair! He stole your Tool! Run for it (it, being the QMS
)!Avoid any fighting, just head for the Picket Sign (perhapz down a little refreshment along the way).
With sign
in hand move so that the enemy Grunt is standing on the CPS and make him your friend .Run to the Grunt
playing with the Toy, and also make him your friend .Finally, run to the last Grunt
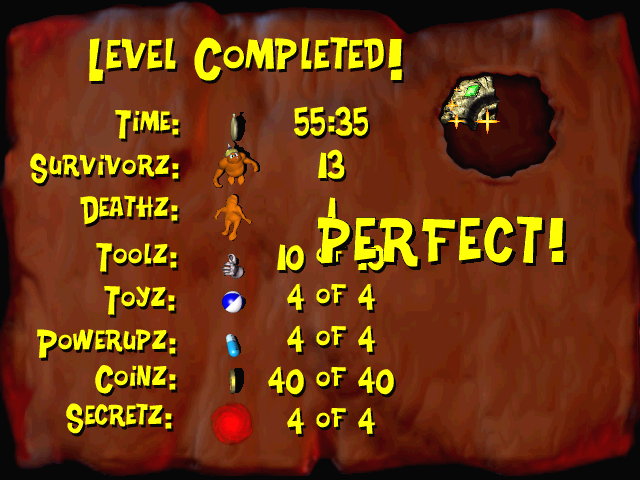
, and also make him your friend ."Hale-Bopp, here I come". Exit, stage left (Death #1).
SAVE! (Unless that was so much fun you want to do it all again.)
#2.Probably, the next thing you will do is pick up a Toy
 and carry it around.
When a buddy askz for it, give it to him.
You will follow your two buddiez, and follow their orderz. Those orderz will make you thirsty!
You see, you are the "point man" ... first to enter any dangerous situation (a "sacrificial lamb").
You will frequently lose your Toob
, but just as frequently get it back again.There is no reason for you to ever pick up any other Tool than the one you have.
#3 as long as you can.
When there is no one within reach (Roomz #3, #4, #5 and #6), find another Tool
 .
.Pick up a Toy
 and use it to satisfy two CPSz
  .
#4 (6) your buddy makez in Roomz #3, #4 and #5.
.
#4 (6) your buddy makez in Roomz #3, #4 and #5.Pick up a Toy
and carry it around.When a buddy askz for it, give it to him.
You are alwayz the third Grunt to enter any area ... to clean it up
.You may also assist in making some of that mess, so quit your griping!
In Roomz #5 and #9 you will satisfy CPSz
 .
.The last thing you will do is find, and occupy a PMGS
.
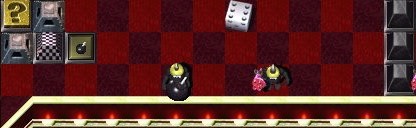
 #1(a)
#1(a) to enter the game endurez some pain
  (and avoidz a pacing enemy Grunt
  ) to "remove the defender"
  and pickz up the Shovel
  in Room #9.
Fillz in Holez
 , digz up Moundz
  , and may help to bash the enemy grunt .
He satisfiez his CPS
 and waitz for the otherz

 to become occupied.
This Grunt may just as well stick around the King's Fortress ... there will be other Shovelz.
 #5 donz High Topz
  to aid the next Grunt.
He will entice two enemy Gruntz
 into unloading their missilez at him (he duckz away), while Grunt #6 pickz up the Rockz
  that Grunt #1 uncoverz.
 #6 and heavez them at every enemy Grunt he can reach.
He startz with the two enemy Gruntz
hurling their missilez his way, then turnz his "tender merciez" toward the one pacing around .He noticez another enemy Grunt
on the other side of a wall, and 'convertz' him .He satisfiez his CPS
and waitz for the otherz to become occupied.Every time he seez Rockz
anywhere, he replenishez his supply.The last thing you will do is find, and occupy a PMGS
... somewhere.
 #7 donz Gauntletz
  and breakz some small thingz


 while avoiding other small thingz
  .
.| He may also tackle a few large thingz |          much later. much later.
|
and waitz for the otherz to become occupied.He may also have to break some enemy Gruntz.

 #3 #3 pickz up Bucket and Trowel
  and goez to work.
He satisfiez his CPS
and waitz for the otherz to become occupied. #5 #5 pickz up a Shovel , fillz in Holez , digz up Moundz .
He satisfiez his CPS
and waitz for the otherz to become occupied. #9 .
. #9
#9
 .
.He satisfiez his CPS
 and may find his way blocked by Red Pyramidz
  (RP).
(RP)."A little help here?" ... and a buddy stepz on a Red Toggle Switch
 (RTS), lowering
  the obstaclez.
He collectz three Coinz
 (Coinz #28, #29 and #30), and stepz on a Blue Toggle Switch
  (BTS) ... three timez!
His participation endz on a PMGS
in Room #5.
 #3.
#3.The last thing he will do is find, and occupy a PMGS
... somewhere.
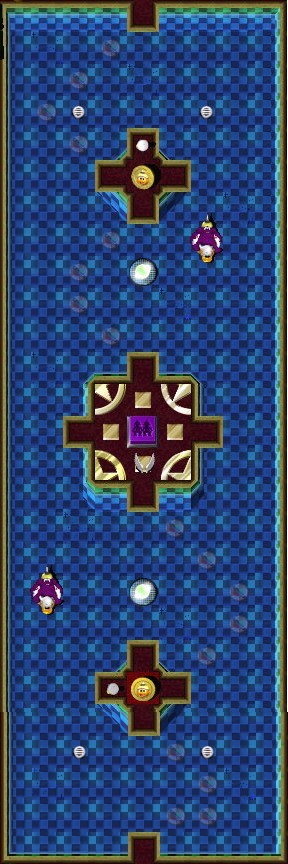
 #2
#2 paddling around?
- Yes. Go placez (such as the Large Pool) that no one else can reach.
'Convert' those enemy Gruntz into something useful  .
. - No. Are there any sharp objectz (or other mislaid Toolz) around? Pick them (all) up!
The last thing he will do is find, and occupy a PMGS
... somewhere.
 #7
#7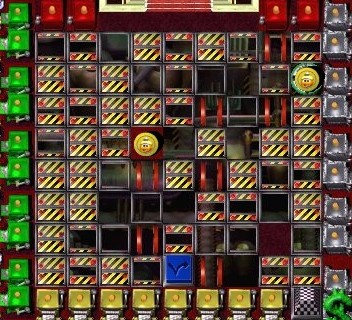 it.
it.Step on the BTS
to raise  Bridge Tilez
  .
.Collect the first Coin and wait for Grunt
#5 to employ his "Super Duper Pooper Scooper".
| Break a small thing (or three ), and then a large thing. |
|
 ... forcefully !
Go west and 'convert' another enemy Grunt
into something useful .Go west again and provoke an enemy Grunt
 into a kamikaze run.
Break the nearby Die
and pick up the Warp Letter  .
.
| Go east and (if necessary) break a large thing |
|
revealing |       , and , and
|
 ... useful, if there is an enemy Grunt pacing around.
If there is anything left to break ... break it!
There should be a Question Mark Switch
(QMS) in plain sight (Shovel #5 revealed it). You should be the only Grunt in the area by now, so it is your responsibility to collect the Coin (Coin #38) on the QMS and follow the cluez.The only object in your path should be a Bomb
 left behind by a crazy enemy Grunt.
Pick it up, and satisfy a CPS
 near the west edge of the map. Good luck!
 #5 #7, fill in Holez , dig up Moundz , bash enemy gruntz , etc.
When there is no longer any need for digging/bashing, head for (and through) the Spikez Field.
Find, and occupy a PMGS
... somewhere.
#1 (PP) go down
  , dig up Moundz and pick up the Warpstone Piece
  .
. to the King!