 Gromiell
 (BW) and divez through.
(He's the leader, after all.)
 Crater and divez through.
A good choice would be beside the one Gromiell entered.
(That leavez only two choicez for Graniel or T'alc. Going past the now empty space leavez six choicez.)
 Graniel and divez through.
 T'alc
T'alc Gromiell
 (GHS), and four Green Pyramidz
  (GP) are lowered
  . Stepz off, and they are raised again. "That's a problem!"
When they are lowered again, he findz a way to cross the four Rolling Rockz
 (RR), using the inactive volcano vent
  as a safe place to analyze his next move. Gromiell then breakz all nine of the Rock Crystalz
  , revealz another Tool and a Toy, collectz a Coin
  and stepz on the Green Toggle Switch
  (GTS).
Saving would be prudent.
Crater, and Gromiell goez to work.
Gromiell callz him, when he findz something useful, and Crater stepz off the GHS
and the Four GPz go down again (and stay down!).He pickz up the Shovel
 and doez what a shovel doez; fill in Holez
  and dig up Moundz
  , and pocket any Coinz he findz. May find something interesting. Graniel
 and savez it for future use. T'alc
 (GW), with a suitable waiting period for it to re-appear (and to give the previous 'diver' time to move).
 T'alc
T'alc from the bottom up (
 ).
).Goez to stand for a while on a Red Hold Switch
 (RHS), lowering
  the three Red Pyramidz
  (RP) blocking access to the stairway.
When those RPz begin going up
and down on their own, it is time to head for the GW , picking up the Scroll  on the way.
 Crater, digz up (certain) Moundz to reveal a Yellow Hold Switch
  (YHS) and to create a path for the RR (which needz to be released by toggling a Two-Way Arrow
  (TWA) to its alternate state
  ) ... all while avoiding being captured by the UFO
  patrolling the area! (Gromiell's turn to go to work.)
After those easy(?) taskz are accomplished, he standz on the YHS
long enough to release the RR ... and movez to safety.The RR
passez back and forth over a GTS and a RTS  .
.Then he somehow eliminatez an enemy Grunt
 and the Object he was guarding ... is unguarded.
Only then doez he go in search of Coinz
, or other interesting objectz.
Gromiell (findz a Coin )
| and a Giant Rock Crystal |         
|
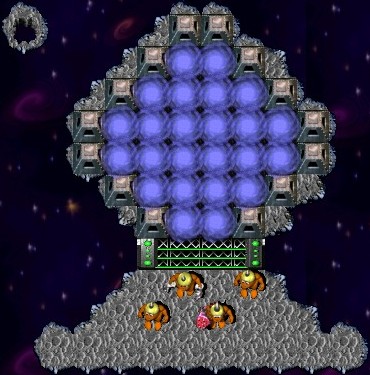
revealing |   . .
|
is important, but why are all of those Spikez there?Should you try to find out why?
Graniel, with a suitable waiting period for it to re-appear (and to give the previous 'diver' time to move).
 seez a CheckPoint Switch
  (CPS) with his 'name' on it, and movez there.
Captain Crater
 seez a CPS
  with his 'name' on it, and movez there.
T'alc
seez where he belongz  .
.Graniel Grantzon
findz his own place  ... the only one left.
Their 'prison' of eight CheckPoint Pyramidz
 (CPP) disappearz
  .
.Wow! Captain Crater
is in his glory, but Colonel Gromiell sayz "No, we don't have time to dig and re-dig all these holez."Crater repliez "With all due respect Sir, there could be new technology here that would very useful to us in the future." But Gromiell will have none of it.
His only other comment is "If it will save your life, you can fill it, but no redigging."
Crater is disappointed, but being a good team member, he doez what he'z told.
(By the way, the Colonel is right!)
Gromiell
and Crater head south and going counter-clockwise dispatch the unfriendlies  (one at a time) while Gromiell also breakz Rock Crystalz
  and uncoverz other goodiez
 and one piece of technology
  (#1) which will add something into the resource box until it is needed.
When the coast is clear, Gromiell
standz above the Arrow and preparez for what'z to come, while a team member with very good timing hitz the not-so Secret Question Mark Switch  (QMS). (Did you SAVE yet? Maybe you should.)
Whew, glad that's over.
It appearz that the only way to get back to the Stargate is via the Toggling Bridge Tilez
 (TBT). Perhapz Crater should go first, to fill in the Holez .
He findz a Coin
in one of them.
, with a suitable waiting period for it to re-appear (and to give the previous 'diver' time to move). breakz a Rock Crystal and seez nothing else to break.
He is not required for the CPSz
 , so electz (like Elvis) to "leave the building".
Crater
noticez something shiny , and pickz it up.Then he fillz in a Hole
and digz up the Mound to collect another Coin .With no other Holez
or Moundz within reach, he too electz to "leave the building".Meanwhile, Graniel
takez a pair of Wingz  from the GruntzMachine (Resources), and Graniel
  and T'alc step on the CPSz .
Hmmm, this could get tricky if you're not paying attention, so another SAVE would be judicious.
Back on Planet #2, a RR
is toggling a GTS and a RTS , and we see the effect here; GPz and RPz are going"Up!
No down! This'll be tough!"T'alc
makez his way through the maze.Graniel
fliez to the Blue Hold Switch  (BHS), raising
  a set of Switchable Bridge Tilez
  (SBT) and standz there until someone crossez it.
Graniel
fliez across to join T'alc .T'alc
should use the Megaphone (#2), (doesn't want the Object) then proceeds on to the Black One-Time Switch  (BOTS), and exitz the maze.
T'alc
readz the Scroll he has been carrying around, and a nearby Goo Puddle  comez back2life. Then he takez the Toy
  he recently called for.
A. Nony Mous
can stand on the YHS now, or if you like, wait until he's needed.(I recommend that you do it now!)
Both dive through the GW
, with a suitable waiting period for it to re-appear (and to give the previous 'diver' time to move).

 here, and the team only has "the right stuff" for two of them!
Gromiell
breakz some Rock Crystalz  and uncoverz some Zap Cola (anyone thirsty?) and a set of TimeBombz
  and decidez to change toolz
  . Graniel's wingz are just about used up.
But it seemz that Crater
has dug up more new technology  .
.Graniel
would like to use that, and "changez hatz"  . Now they have what they need!
Everyone takez their place on the four CPSz
, and the CPPz are lowered . T'alc and Crater just head for the GW .There are four enemy Gruntz


 in there, 'defended' by UFOz .
Rather than killing the same enemy over and over, a SAVE after each one is defeated would be a smart thing to do. Gromiell
is the obvious choice to eliminate the guardz.(I promise you, there are safe spotz between each UFO
, as well as those within "the eye".)Stay on a safe tile while Graniel
makez his way to the stairz.(SAVE!!)
Graniel
layz a Brick  to get rid of those RRz , walkz around and repeatz the process on the next level.
Gromiell
may blow up the Brickz , if you like.It isn't absolutely necessary, as you can bypass the Arrowz


 to get back out.
Gromiell
waitz by the stairz as Graniel stepz onto the final level.(See that Odd Tile? Step on it and get out fast!
Gromiell
will know what to do next.Later, make your way back to the GW
and join the rest of the team, with a suitable waiting period for it to re-appear (and to give the previous 'diver' time to move). blowz up a Rock Crystal ... but it is empty.
Crater
fillz in three Holez that area easy to reach and digz up the Moundz ... two are empty, one yieldz a Coin .As fond as he is of digging, those eighty-nine Holez
give him pause to think.Meanwhile, T'alc
comez warping in. Oh-oh! You're missing Graniel .It appearz that he is in that prison to the north. Lookz like he's kinda stuck there.
Crater
, with his brilliant mind sayz "Maybe not. If you examine the arrowz carefully, you'll see that one or two seem to be telling us something. If we analyze our findings carefully. . ."Gromiell
interruptz "Get to the point, Crater."Crater
sayz he seez a quick way through the Lava Geyserz  and Holez , and beckonz T'alc and explainz as he fillz in two Holez .
With a boost over an Arrow
from T'alc , Captain Crater getz through the hazard field and digz up a Coin .He seez that there is a Blue Toggle Switch
 (BTS) that needz pressing so the otherz can join him, and obligingly stepz on it.
- Option #1: Gromiell crossez the SBTz and setz a Time Bomb
 next to the enemy Grunt ... and takez a step back. He takez a whack, but one problem solved.
 - Option #2: Gromiell (grumbling) goes around to the left, walkz through the aisle of cratez and discoverz Springz
 .
.
He hesitatez to change toolz, since springz can neither break a rock nor blow one up, but seeing no other choice, he pickz them up.
But there'z that guard
by the entrance to the prison.Well, we'll just have to get rid of him. What'z that sparkling behind the fuel tankz?
Crater
thinkz "All right, something that will help out!!!!"Gromiell
 'springz' to the attack, along with the reinforced Crater , and there is a quivering Goo Puddle
  left behind.
(who followed Gromiell (or Gromiell ) across the SBTz ) takez over to push the second guard by the bridge into the wide black yonder, and they can gang up on the third guard .
left behind.
(who followed Gromiell (or Gromiell ) across the SBTz ) takez over to push the second guard by the bridge into the wide black yonder, and they can gang up on the third guard .After the opposition has been dispatched, they notice movement on the exterior west wall of the prison, and Captain Crater
goez to investigate, discovering another Megaphone .If you chose option #1, now you take the first step of option #2, with Gromiell
returning across the SBTz and coming back as Gromiell .Gromiell
enterz the prison, but stopz short at the QMS . That's a problem!Captain Crater
yellz "Hey, Colonel, here's some more alien technology that might be easier to use than those Springz."The Colonel gladly tossez away the Springz, and putz on the Gravity Bootz
 instead, and stepz on the not-so Secret QMS and setz Graniel free.
 is now in his glory as he startz shooting enemy Gruntz
  (who blow up from even that gentle touch.)
He eliminatez the fragile enemy Gruntz
and putz the other four (near-sighted!) enemy Gruntz  onto the Purple Multi-Grunt Switchez
  , all the while collecting fourteen(!) Coinz during his "target Practice".
Team memberz may now refresh themselvez with the Bottlez of Zap Cola
(not necessary).They decide who should get the Warpstone Piece
 on that little moon to the east.
Graniel
sayz "Maybe this will help".T'alc
sayz "And I have this . Maybe he playz 'catch'!"Three of you can return to the Stargate if you like (just wastez a little time).
Is A. Nony Mous
standing on the YHS on Planet #4? He's needed now.The Grunt who drew the short straw can cross the Crumbling Bridge Tilez
 (CBT), distract the enemy Grunt , and pick up the Warpstone Piece and go through the BW .
Give the Warpstone Piece
to the General at headquarterz. There might be a medal in it for you, or at the very least a PERFECT!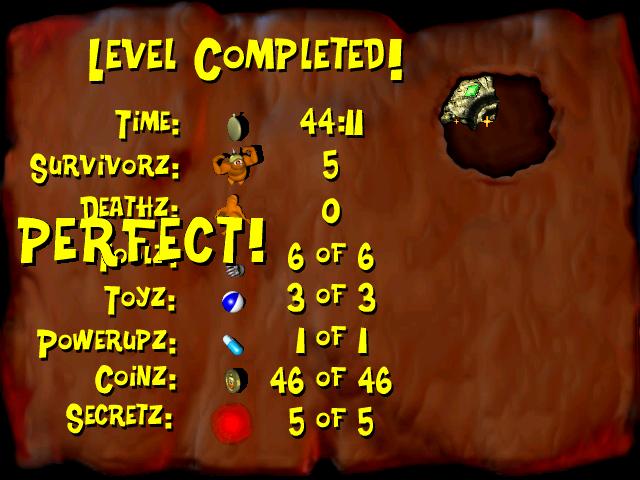