Tile mode (only)
NOTE: THERE IS NO UNDO FOR THIS FEATURE!
Also, this is an advanced feature that, if used incorrectly, could potentially screw up your level! Test this out in a new or test level before trying this on something you really care about.
To flood fill all tiles in a level:
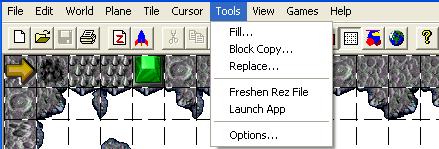
| 1 | Select Fill… from the Tools menu. |
| 2 | Select the type of fill you want to do. You can enter a tile number (which will fill the entire level with that tile), set it to invisible (useful for clearing out the tile contents of an entire level, but note that it will not clear out the objects), or set it to the default color (useful if you want to set a background layer to a solid color, such as blue for a sky). You can set the default fill color by selecting Properties from the Plane menu, and then setting the color value in the Misc area of the properties dialog. |
| 3 | Set the origin for the fill (it will fill down and to the right from the origin). |
| 4 | Did I mention there is no undo for this feature?!? |
| 5 | Click OK when you're ready. |
NOTE: This is an advanced feature that will OVERWRITE any tiles in the paste area. Test this out in a new or test level before trying this on something you really care about.
NOTE: THERE IS NO UNDO FOR THIS FEATURE!
To block copy a set of tiles:
| 1 | Select Block Copy… from the Tools menu. |
| 2 | This is where things get a little complex. There are 6 fields listed, with each field having a specific meaning. You need to enter numerical values in each of the fields. Use whole numbers. |
| 3 | Enter the value for the Source Column. The source column is the column number of the top left corner of the block of tiles you want to copy (think about this as a coordinate system for a rectangle, with the top-left corner of the rectangle being the origin of the coordinate system). If you're unsure as to the column number, it's the first number listed on the status bar (bottom of window) when a tile is selected. |
| 4 | Enter the value for the Source Row. The Source Row is the row number of the top-left corner of the block of tiles you want to copy. If you're unsure as to the row number, it's the second number listed on the status bar when a tile is selected. |
| 5 | Enter the value for the Dest Column and Dest Row. These are the top-left coordinates of the area where you want to paste the tiles. |
| 6 | Enter the values for Copy Width and Copy Height. Copy Width is how many tiles to the right you want to copy (your x-delta). Copy Height is how many tiles down you want to copy (your y-delta). Note that these are delta values, not absolute tile position values. |
| 7 | Did I mention there is no undo for this feature?!? |
| 8 | Click OK. The block of tiles you copied should appear in their new position. |
NOTE: THERE IS NO UNDO FOR THIS FEATURE!
To use the replace feature:
| 1 | Select Replace… from the Tools menu. |
| 2 | Enter the tile number that you want to find. |
| 3 | Enter the tile number you want to replace it with. |
| 4 | This feature is global, and therefore acts on every instance of the tile you're searching for… |
| 5 | Did I mention there is no undo for this feature?!? |
| 6 | Click OK. |
| 7 | The tile you wanted to replace should now be replaced everywhere it appeared in the level. |
Selecting this option will make the editor load images quicker since it will only load a single image for an object that may have multiple frames of images because it is an animating object. Note: this does not effect the way the game works, it is only an option to speed up the performance of the editor.
This feature is used to set an alternate path for the game REZ file. This option will probably never be used since the user will typically only have one REZ file. Note: This feature was used for development only.