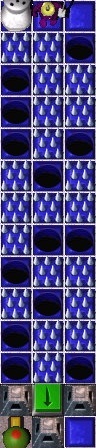
 grunt #3
(free to move)
 , eliminatez the other enemy grunt
  to the north.
Get the Baby-Walker
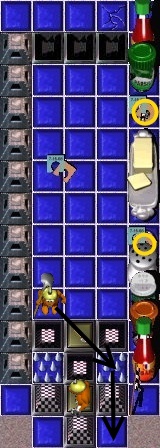
 ((Toy #1)) and return to the area between the two small griddlez (note the arrow in the tile work floor).
Select the Baby-Walker
and drop it on the other side of the divided wall.Step on the Black One-Time Switch
 (BOTS) in the northeast corner of the level.
This will free the Bare-handed
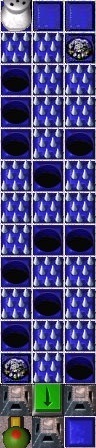
gruntz #1 and #2 at the starting position. grunt #2(on the left)
, take it to the CheckPoint Switch  (CPS) to the northwest (lowering
  the CheckPoint Pyramidz
  ... CPP).
Step on the Blue Toggle Switch
 (BTS).
You don't need the Toy anymore, so why not just drop it on the CPS
?Return to the starting area.
grunt #1(on the right)
 ) and get the Tool (Tool #1).
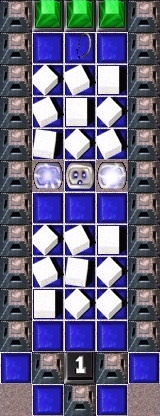
There are six Holez

 and three Moundz
 you can reach easily ... one is under your feet!
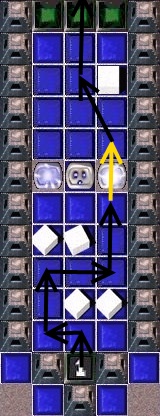
Backtrack through the maze using the Shovel
 to reveal a pair of Gauntletz
  (Tool #2), two Coinz
  (Coinz #1 and #2) and get the Warp letter 'W'
  . grunt #3
(in less than perfect health)
and pick up the Gauntletz .Break all four Sugar Cubez


 that are nearby, without annoying the enemy grunt
  ... or satisfying your thirst
  !!!
!!!
 #3
#3(the more aggressive grunt) and
Shovel
grunt #1(in perfect health)
, with grunt #3 beginning one step closer to the enemy than grunt #2.It is important here that the Shovel
grunt #2 takez NO damage, but helpz with eliminating the enemy grunt .
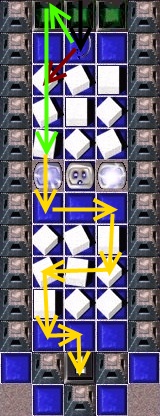
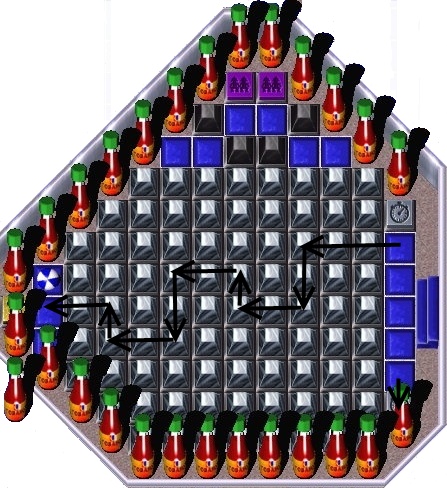
grunt #1 the first Hole in the Spikez  /Holez maze.
From this Mound
, move the Shovel grunt over the Spikez 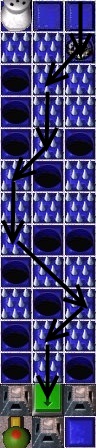 to the Green Hold Switch
  .
.Do not stop to fill any Holez
now. Wait patiently there until grunt #3 finishez his task. (You may make use of the waiting time by filling in the two Holez you can reach from where you are standing, but only one needz to become a Mound .)
grunt #3 ((Toy #2)) and deposits it on the other side of the wall where the Baby Walker was dropped.
Then break the two groups of Sugar Cubez and step on the BOTS
 (perhapz breaking one last Sugar Cube before you do).
Exit this area beyond the Green Pyramidz
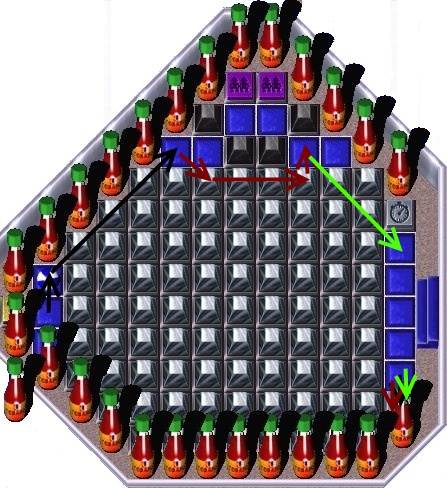
 (GP). grunt #2 and takez it to the CPS
Step on the Green Toggle Switch
 (GTS).
You don't need the Toy anymore, so why not just drop it on the CPS
?Return to the starting area.
Now have him traverse the moving walkway
 across the water and wait for the Monster Wheel
  .
grunt #1
.
grunt #1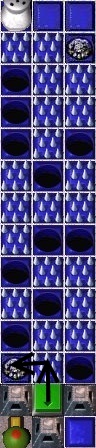 and fills the Holez
 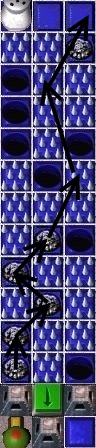 until he is halfway back out through the Spikez field.
From here, he can walk the rest of the way out and get the Keg of Zap Cola
.
There is a Coin (Coin #3) in a Hole before the first Gauntletz and Shovel CPSz 
 � find it?
grunt #3
� find it?
grunt #3and Shovel
grunt #1Shovel
grunt #1 has to continue through the CPS to one of the Spikez  tilez before the CPPz are all the way up or he will be trapped.
Then he fillz in the Hole
and digz up the Mound in the center of the three arrowz to reveal the Question Mark Switch  .
.Meanwhile, Gauntletz
#3 breakz the Giant pile of Sugar Cubez
         . .
|
which revealz two Moundz one containz a Coin , the other containz a Tool.
|
 . .
|
#1 then digz up the Moundz to reveal the GooberStraw  (left there, for now) and a Coin (Coin #4).
Dig up the Mound
and watch the Rolling Olive  drop into the Hole . (If no one stepz on the BTS in the path of the departed Rolling Olive , there will be two pieces of cereal
  in the water to the west that are always visible.)
Have you SAVEd lately? What happenz if Gauntletz
#3 stepz on the Question Mark Switch ?If you were too slow, aren't you glad you listened to me?
Gauntletz
grunt #3 now standz on the Yellow Hold Switch  (YHS) with the circling Kitchen Slime. (His work is done.)
Shovel
#1 picks up the GooberStraw (Tool #3). grunt #1

 and enterz the arrow maze so he getz the Monster Wheel (Toy #3).
He continues through the maze to the Yellow Toggle Switch
 (YTS) and stepz on the Intersection Arrow
  to the south.
He stepz on the BOTS
. Now is a good time to SAVE!He now has to take out the six enemy gruntz

 below (preferably one at a time) and suck up each goo puddle
  left behind.
He then picks up the Toob
 (Tool #4).
 grunt #1 (Coin #5) and then further north to the divided wall section.
Drop the Monster Wheel
on the other side of the wall. grunt #2 and takez it across the Toggling Cereal  tilez to the CPS
Step on the Orange Up/Down Switch
 (OU/DS).
You don't need the Toy anymore, so why not just drop it on the CPS
?Return to the starting area.
Now have him traverse the moving walkway
across the water and wait for the YoYo  .
grunt #1 (Toy #4) in the field where the six enemy gruntz were.
.
grunt #1 (Toy #4) in the field where the six enemy gruntz were.He has to drop it the same place that he dropped the Monster Wheel
earlier.Paddle down to the southwest Landing Dock
 ... and puncture your Toob.
grunt #1 the GP
... and puncture your Toob.
grunt #1 the GP  blocking your way. grunt #4
 , there is not a lot of room to move around in ... except to the GHS . grunt #1 and
Bare-handed
grunt #4 .
.Dodging aerial missilez, and using a "leap frog" method, the gruntz pass through the two set of Red Pyramidz
 and Green Pyramidz .
One of them (for the purpose of this walk-through, say it is grunt #1) pickz up the Gauntletz
and "takez it to" the two enemy gruntz 
 who were tossing those aerial missilez.
(Now) Gauntletz
grunt #1 breakz one of the Sugar Cubez the enemy gruntz were guarding, revealing some refreshing Zap Cola  , another one revealz more Zap Cola
  ... and the last
  revealz a set of Wingz
  !
!The grunt most in need of refreshment downz the Bottle of Zap Cola
and then the grunt most in need of refreshment (it could be the same grunt!) downz the Can of Zap Cola .Grunt #4 pickz up the Wingz
and becomez Wingz grunt  #4.
grunt #1 and
#4.
grunt #1 andWingz grunt
#4
 .
.Wingz grunt
#4 must now fly northwest to the Landing Dock  and then southwest over to the Blue Hold Switch
  (BHS).
Gauntletz
grunt #1 crossez the raised Bridge  to the Landing Dock
  .
.Wingz grunt
#4 may be distracted by something interesting.Wingz grunt
#4 then walkz across the automatic Bridge  tilez to join Gauntletz grunt #1 on the other Landing Dock .
Wingz grunt
#4 then walkz across the Crumbling Bridge  to pick up the Pogo Stick
  (Toy #5) and then fliez back (probably losing his Wingz as he landz).
Gauntletz
grunt #1 stepz on the BHS and (now) Bare-handed grunt #4 walkz north across the raised Bridge to trigger the BTS and east to his CPS  .
.Gauntletz
grunt #1 walkz around the Crumbling Bridge and across the raised Bridge to his own CPS .
grunt #1 andBare-handed
grunt #4 grunt #1 movez through the Rolling Olivez and Arrowz section.He breakz the Sugar Cubez
, getz the Warp letter 'P'  , stepz on the BOTS and step on the right OU/DS .
Teamwork time!!!
| Gauntletz grunt #1 operatez the OU/DS |
while Bare-handed grunt #4 movez through the Pyramidz |
 
|

|
|
|
|
grunt #4 depositz the Pogo Stick on the other side of the divided wall to the north.Gauntletz
grunt #1 breakz the three Sugar Cubez to reveal a Coin (Coin #7) and a Squeak Toy  (Toy #6).
Gauntletz
grunt #1 depositz the Squeak Toy on the other side of the divided wall.Using the Silver Timer Switchez
 , send Gauntletz grunt #1 to the west side of the Silver Pyramidz
  (SP).
(SP).Gauntletz
grunt #1 pickz up the Beach Ball  (Toy #7).
There is another Question Mark Switch
here ... what do you think that does?Gauntletz
grunt #1 movez back across the SPz so he can deposit the Beach Ball on the other side of the wall. grunt #5, the grunt immediately comez under fire, so move! Where? Go get that Pogo Stick !He carriez it to where it will be handy for Bare-handed
grunt #2 to put away, then returnz to the place where he received the toy.He may find another toy waiting there for him ... or he waitz for it.
Some delay expected here.
He pickz up the Squeak Toy
and takes it to Bare-handed grunt #2 to put away, then returnz to the place where he received the toy.Some delay expected here.
He pickz up the Beach Ball
and takes it to Bare-handed grunt #2 to put away, then wanderz down to wait at the south end of the gully.
grunt #2 and takez it across the Toggling Cereal tilez to where he pickz up a Bomb
  (Tool #5) and waitz for the Purple Pyramidz
  (PP) to go down
  , so he can move to the CPS
  .
.Some delay expected here.
Step on the YTS
, changing the Two-Way Arrow from north-pointing  to south-pointing
  .
.You don't need the Toy anymore, so why not just drop it on the CPS
?Shuttle on back to where Bare-handed
grunt #5 left a Pogo Stick in a ToyBox.Shuttle back to the
CPS and step on the BTS .You don't need the Toy anymore, so why not just drop it on the CPS
?Shuttle on back to where Bare-handed
grunt #5 left a Squeak Toy in a ToyBox.Shuttle back to the
 CPS, but DO NOT step on the OU/DS yet.
You don't need the Toy anymore, so why not just drop it on the CPS
?Gauntletz
grunt #1, Bare-handed grunt #4 and Bare-handed grunt #5 go back to work.Some delay expected here.
 .
. .
.