 Bare-handed #2
 (Tool #1)!
 Gauntletz #2
- Break all of the Ice Crystalz


 you can reach.
 - pick up a toy (and set it down again some place near Grunt #3)
- pick up a Scroll
 (Toy #2) ... save it for later
 - use a Megaphone
 (Megaphone #1)
 - pick up a Coin
 (Coin #1)
 - and (the hard part) get an enemy grunt
 to stand on a Purple Multi-Grunt Switch
  (PMGS), lowering
  nine nearbyPurple Pyramidz
  (PP).
(PP).
, and stand (for a while) on a Yellow Hold Switch  (YHS). Bare-handed #1 & Bare-handed #3
(PP) now lowered .
Bare-handed #3
(YHS). Bare-handed #1 & Bare-handed #3
(PP) now lowered .
Bare-handed #3 (Tool #2) and the Pogo-Stick
  (Toy #1) that Gauntletz Grunt #2 set down nearby. Bare-handed #1
 (Tool #3) that Gauntletz Grunt #2 uncovered.
 GooberStraw #1
 , perhapz help convert an enemy grunt into another Goo Puddle
  , and suck it up.
 Springz #3 into a Goo Puddle .
Go placez no one else can reach (painlessly), like hopping through the Spikez
 and Holez
  field, where you pick up a Coin (Coin #2).
He then activatez a Black One-Time Switch
 (BOTS), which lowerz
  some Black Pyramdz
  (BP) ... and raisez some that were lowered ! Gauntletz #2 & GooberStraw #1
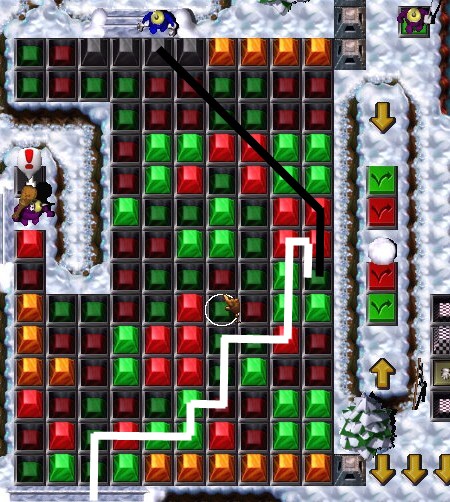
| Then Gauntletz breakz the Giant Ice Crystal |         
|
revealing |          . .
|
Gauntletz carefully removez the four enemy
 Gruntz on the plateau.
Gauntletz #2
Gruntz on the plateau.
Gauntletz #2 into a Goo Puddle
  .
.Breakz Ice Crystalz


 , collectz two Coinz (Coin #3 & #4),
breakz Brickz


 until what is left is either unreachable, or unbreakable
  .
.Findz a suitable place, settlez down to do some light reading
... and doez a quick-step.Breakz more Ice Crystalz
, collectz two more Coinz (Coin #5 & #6). GooberStraw #1 , and then pickz up a new Tool
  (Tool #4).
 Bomb #1 Gauntletz cannot break.
(Death #1)
Gauntletz #2 & Springz #3
surrounding a Green Hold Switch  (GHS).
Only one of them
absolutely has to be broken, but all eight may be broken.(Breaking them all takez more time, but makez movement easier, later.)
Springz Grunt #3 hopz onto the GHS
 and three Green Pyramidz
  (GP) to the west are lowered
  . Gauntletz #2 then breakz two Ice Crystalz and pickz up the Squeak Toy
  (Toy #3) he findz.
Gauntletz Grunt #2 movez to the Landing Dock
, movez to a stable  Bridge Tile and waitz for Springz Grunt #3 to move onto a Blue Hold Switch
  (BHS), creating another stable Bridge Tile, then crossez through that spot to the next 'safe' place.
Springz Grunt #3 movez to the other BHS
, creating another stable Bridge Tile, then crossez to the Landing Dock . (Watch out for flying objectz!)Springz Grunt #3 movez back to the GHS
and Gauntletz #2 addressez his next challenge ... avoiding missilez while 'encouraging' another enemy Grunt  to help him out by standing on one PMGS
  for a while, so he can stand on the other one, lowering two nearby PPz . Makez a slight detour to uncover a Coin (Coin #7).
While he is attempting this task, Springz Grunt #3 movez to the lowered GPz
and waitz for the PPz to be lowered .When they are, he hopz to the safest place he can find, waiting for Gauntletz Grunt #2 to join him.
Gauntletz Grunt #2 findz a way to eliminate four enemy Gruntz


 sending missilez his way. When there are four Goo Puddlez, he lookz for a way to use them.
He pickz up a GooberStraw
(Tool #5) , and becomez GooberStraw Grunt #2.
GooberStraw #2 , and pickz up a new Tool (Tool #6). Gauntletz #2 &
 Springz #3
Gauntletz #2 crossez a Crumbling Bridge , leaving some stonez for his buddy.
Springz #3
Gauntletz #2 crossez a Crumbling Bridge , leaving some stonez for his buddy.Findz something breakable
, so he breakz it. Springz #3 crossez to join his buddy, noticez there are lotz of Holez around, and a couple Moundz  , as well. Wonderz what may be in them, and spotz a Shovel
  ... in the handz of an enemy
  Grunt! "Hey! Come over here and help me with this!" Nothing.
"Guess I need to get his attention" ... so he doez ... then movez away so he doesn't regret it.
Then he rewardz the guy for his hard work, by giving up his toy
(carried it quite a while).The
Grunt probably makez a bad hop, and exitz the game.Either Grunt then pickz up the two Coinz
(Coin #8 & #9) he was 'encouraged' to reveal. Gauntletz #2 breakz another Ice Crystal and usez the Megaphone (Megaphone #2) he uncoverz. "Now what good is that to us?" Springz #3 noticez a RSB  causing a problem, and a possible solution.
"Hey Grumly! Didn't you send us some Bricklaying toolz
 ?" (Tool #7)
He sure did, so the transformation is made to Bricklayer
 #3.
Gauntletz #2 & Bricklayer #3
Bricklayer #3 layz a single Brick
#3.
Gauntletz #2 & Bricklayer #3
Bricklayer #3 layz a single Brick  in the path of the RSB , breaking it. Gauntletz #2 breakz that Brick and standz on the GHS . Bricklayer #3 activatez the BOTS , lowering two nearby BPz ...
and three more BPz
surrounding a GruntCreationPoint  !!!
!!!Then he putz the explosive
 Brick into his backpack.
(You can enter Grunt
 #1 into the game now.)
Both Gruntz cross the short bridge
over Bad Water to the south. Gauntletz #2 breakz an Ice Crystal , expecting an attack. Nothing.So
Gauntletz #2 breakz another Ice Crystal  , expecting an attack. Still nothing.
He movez toward a stack of Brickz
and getz an explosive reaction from another Grunt.It seemz that stack had a 'sleeper' atop it, and was really
 . "Better him than me!"
When the top Brick (the explosive one) was broken, the brick below it was destroyed
.Gauntletz Grunt #2 movez to break the remaining Brick, but another enemy Grunt beatz him to it.
"Ah. A little help here?" He headz for his buddy, and his buddy startz laying an explosive Brick.
The explosive
Brick is in place, and Bricklayer #3 stepz back a bit.The enemy
 Grunt is hot on Gauntletz #2's trail, and is blocked ... not for long.
Boom! The expected happenz, and the enemy
Grunt, the explosive Brick and the unbreakable Brick  on top are gone, leaving a breakable Brick . Gauntletz #2 breakz that Brick and pickz up the Squeak Toy (Toy #5).
He goez up and activatez the BOTS
and pickz up the Coin (Coin #15) next to it.He antagonizez the last enemy
Grunt into chasing him, and givez away the toy when the Grunt is standing on the PMGS .They then hurry down to the lowered BPz
south of the stairway 

 .
.Now all they have to do is find a path through the Red and Green Pyramidz.
On the wide stairway, Bricklayer #3 layz a Brick in the path of the RSB
, breaking it.Gauntletz Grunt #2 breakz the Brick
, a small Ice Crystal , and three Giant Ice Crystalz.He revealz a Shovel and more breakable thingz ... and some diggable thingz.
Bricklayer Grunt #3 sayz "That's the thing for me!" and pickz up the Shovel
(Tool #9)
Gauntletz #2 & Shovel #3
 putz the new tool to work, and earnz a Coin (Coin #16). Gauntletz #2 breakz the breakable thingz, and collectz a Coin (Coin #17).
Shovel #3
Shovel #3 putz the new tool to work, and earnz a Coin (Coin #16). Gauntletz #2 breakz the breakable thingz, and collectz a Coin (Coin #17).The one most in need downz the Bottle of Zap Cola
 .
.They move south, where Shovel
Grunt #3 digz up another Coin (Coin #18).
Bare-handed #1, replacing the deceased Grunt #1.Just three stepz away, there is a Sword
 (Tool #8) ... go get it!
 Sword #1
 doing there? You can't be thirsty!
There's a good chance you will be! You see, there are guardz all around several BOTS
.It's your job to see them all activated
 . Start easy ... south to two enemy guardz.
To the east await five restless enemy Gruntz
... dispose of them!(If you can get one of them to make a kamikaze run ... eastward(!) ... so much the better.)
On the plateau further east, there await four thirsty
 Gruntz desiring your Goo
  ... and willing to do some 'conversion' work ... on you!
Your work is cut out for you, and you have no meanz
to collect their Goo , so spare no meanz of disposing of them. (Did someone run east?)In the next gully southward, there are two more enemy Gruntz
 .
.In the gully eastward there is an Ice Crystal
. Can you get someone to break it for you?You can easily defeat the two Gruntz, so why not try for some assistance?
Have you discovered the reason for that Zap Cola
you've seen? Satisfied some thirst?If you 'encouraged' some help earlier, pick up the Coin
(Coin #24 otherwise).The next two(?) enemy Gruntz
 can do some whuppin' with those big ugly clubz.
But since they are guarding BOTSz
, you have to remove them.You can go all the way to where you entered the game, and pick up another tool ... but there's more you can do with the one you have. Go Blue Wormhole
 (BW) diving, instead.
You land and find yourself under attack. Dispose of the attacker
 !
!Pick up the Coin
(Coin #10).Remove the defender (chess term) guarding your way out ... the BW
. But wait!That was a lot of effort for one Coin. Is there anything strange about that?
You should be able to walk south and make your way to another BW
.You land where there are four Rolling Snow Ballz
(RSB) to the east.Cross past them! See what happenz when you stand on that PMGS
.If the PPz
are now lowered , proceed to your CheckPoint Switch  .
.If not, you will have to wait for a while, for your buddiez to get some taskz done.
Gauntletz #2 & Shovel #3 & Sword #1
Shovel #3 and Gauntletz #2 join the newly-baked replacement for Grunt #1. Gauntletz #2 discoverz some thingz to break and callz his buddy over to help acquire a Coin (Coin #19).They investigate (together) the Question Mark Switch
 (QMS) that was explosively uncovered.
Then all three Gruntz satisfy their CheckPoint Switchez

 Gauntletz #2 breakz a couple of Ice Crystalz . Shovel #3 digz up a Mound . Sword #1 pickz up everything revealed, a toy
  (Toy #5) and a new tool
  (Tool #10), becoming Boxing Glovez
  Grunt #1.
Gauntletz #2 & Shovel #3 & Boxing Glovez #1
Boxing Glovez #1 'encouragez' and enemy Grunt to stand on a BHS
Grunt #1.
Gauntletz #2 & Shovel #3 & Boxing Glovez #1
Boxing Glovez #1 'encouragez' and enemy Grunt to stand on a BHS  .
.
| Then Gauntletz breakz the Giant Ice Crystal |
|
revealing |   
|
a Coin (Coin #25) in the center. |
, and Shovel #3 fillz in one Hole and joinz him. Boxing Glovez #1 'encouragez' the enemy  Grunt to move off the GHS
 (He must have a "glass jaw", because he just standz there while Grunt #2 waits.)
Gauntletz #2 breakz both Ice Crystalz , revealing Holez . Shovel #3 fillz in both Holez and both Gruntz pick up a tool . Bomb #2 & Bomb #3 & Boxing Glovez #1
Boxing Glovez #1 crossez first and setz down his toy  .
.He enticez the enemy
Grunt into making a kamikaze run.He movez a little, and angerz the
Grunt again.One after the other the two Gruntz carrying Bombz
cross to join him.One sacrificez (Death #2), then the other (Death #3) and a clear path remainz.
Boxing Glovez #1 punchez the enemy  Grunt into the Hole , and pickz up the Jack-In-The-Box
  (Toy #6) and divez through the BW .
Boxing Glovez #1
(Toy #6) and divez through the BW .
Boxing Glovez #1 to attack him, and runz for an Arrow
  .
.Usez a Megaphone
, and when he findz out what he'll get, putz down his toy .Takez the new toy
 from Resourcez, and jeerz an enemy Grunt
  into chasing him.
When the enemy Grunt
stepz onto the PMGS , he handz him the Jump Rope .He goez back and pickz up the Jack-In-The-Box
he set down.With another enemy Grunt
 in hot pursuit, crossez a Crumble Bridge
  .
.When the enemy Grunt
stepz onto the PMGS , he handz him the toy .He crossez the other Crumble Bridge
and amblez up to the last PMGS .The three PPz
in front of Grunt #4 go down , and he is free to move. Welder #4
 (or two , if you like disintegrationz).
With that effort clearing away dangerous opposition, pick up the Warpstone Piece
 .
.
 Warpstone #4 to the King!