Story by FriedGruntzaholic (David De Haven) and Graphicz by GooRoo
PLAYING THE LEVEL
Get the Megaphonez
 to call down the Springz
  (Tool #1 for grunt #3), Spy
  gear (Tool #2 for grunt #5), and Gauntletz
  (Tool #3 for grunt #4).
Give one tool to each grunt.
In the northeast corner of the Start Area, there is a hidden Black One-Time Switch
 (BOTS), cleverly disguised as an ordinary tile
  .
.Under no circumstance should any of the gruntz step on this switch.
Doing so prohibitz the gruntz from finishing the level (It raisez
 a Black Pyramid
  (BP) in the path of a Rolling Rock
  RR).
RR).With the exception of the bomb brickz

 , Gauntletz
  #4 breakz all breakable brickz

 , including the red gauntlet-breaker brick
  ->
-> ->
-> ->
-> , using the Spy
  #5 where necessary.
Springz
 #3 jumpz on a Green Toggle Switch
  (GTS) that is hidden behind the satellite, raising
  a Green Pyramid
  (GP) killing the enemy grunt
  and setting off an explosion that destroyz one of the gold unbreakable brickz
  .
.Springz
#3 jumpz on the GTS again, re-lowering the GP .One grunt (probably Bare-handed
 grunt #4) collectz a Coin
  (Coin #1) that is hidden behind the tankz below the (lowered) GP .
Spy
grunt #5 hurriez northward across the crumble bridgez 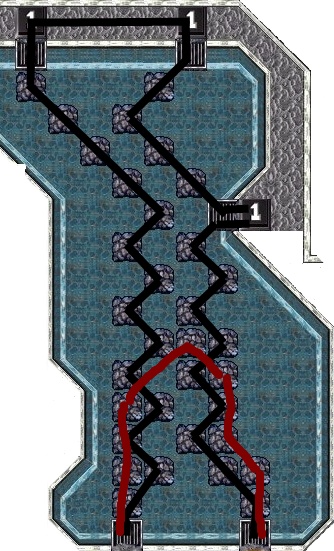 and tripz all three BOTSz , leaving enough bridge tilez in place for a Springz grunt to cross the pool from the left Landing Dock
  to the right Landing Dock .
After pressing all three switchez, the Spy
#5 headz for the right Landing Dock .The now barehanded
grunt #4 walkz to the upstairz area to the southwest and waitz beside the Orange Pyramid  (OP)
(OP)Springz
#3 hopz to the upstairz area to the southeast and onto the lower Orange Up/Down Switch  (OU/DS).
- Togglez the upper OU/DS from inactive
 to active
 - Togglez the lower OU/DS from active to inactive
- Allowz the Bare-handed grunt #4 to pick up the Springz (Tool #4) lying on the ground behind the (lowered) OP
 (becoming Springz #4)
#4 goez north to collect a Coin (Coin #2), and may now go trigger RedWarp  #1 (RW).
Springz
#3 jumpz onto the upper OU/DS which
- Togglez the upper OU/DS from active to inactive
- Togglez the lower OU/DS from inactive to active
- Allowz another grunt access to the left Landing Dock
#3 remainz upstairz with the two OU/DSz until Springz #4 reachez the left Landing Dock .After returning to the pool from RW #1, Springz
#4 headz for the left Landing Dock .Springz
#3 jumpz onto the other OU/DS to raise the OP on the left hand side of pool and lower the OP on the right hand side to allow the Spy grunt #5 and Springz grunt #4 to continue.Then Springz
#3 hopz quickly to the western edge of the Start Area to wait on the land just to the right of the Silver Pyramid  (SP). (The wait could be long, if you were quite efficient up to this point. Perhapz you could do something with Bare-handed grunt #6 or Spy grunt #5 while you have to wait.)
When the SP
goez down  , Springz #3 quickly jumpz onto the CheckPointSwitch
  (CPS) before the SP raisez and waitz there for the time being.
If Springz
#3 failz to make it past the SP in time, the level cannot be completed.Return to where the Spy
grunt #5 and Springz grunt #4 are waiting.Spy
grunt #5 "blazez the trail" and Springz grunt #4 finishez crossing the pool, enterz the RR obstacle from the top left corner and exitz through the bottom right corner.The Spy
#5 picks up the Gauntletz (Tool #5 becoming Gauntletz #5) and breakz the Rock Crystal  between the two Construction Pyramidz
  .
.This uncoverz a timebomb, starting a chain reaction that uncoverz a Blue Hold Switch
 (BHS).
The Gauntletz
grunt #5 and Springz grunt #4 step on the CPSz , lowering  the CheckPoint Pyramidz
  (CPP) on the right hand side of the pool where Barehand grunt #8 waits. grunt #8 across the automatic toggling bridge
 to the switch-controlled bridge tile
  to the Landing Dock on the mainland.
You may bring Bare-handed
grunt #7, on the left side of the pool, across the automatic bridge to the toggled bridge tile to the Landing Dock , but he remainz trapped for now behind the CPPz on his side of the pool.
Bare-handed #8 standz on the BHS , raising  the bridge tilez
  to allow Gauntletz #5 and Springz #4 to cross over.
Bare-handed
#8 and Springz #4 trade placez and Gauntletz #5 and Barehand #8 walk south through the narrow corridor to the first RR /arrowz obstacle.
After crossing the first obstacle, they cross the bridge to the island, and cross the second RR /arrowz obstacle.Once through the second obstacle, they walk east, then north to the upstairz area and each pickz up a set of Springz
(Tool #6 & Tool #7), becoming Springz #5 and Springz #8.Neither grunt crossez over the TWA
 .
Springz #5 and Springz #8 hop downstairz to the south side of the island.
.
Springz #5 and Springz #8 hop downstairz to the south side of the island.Springz
#5 jumpz onto one(!) crumbling bridge tile  , onto the single solid bridge tile , then to the Landing Dock
  island to the east.
The three Purple Pyramidz
 (PP) and three GPz nearby to the east are ignored; they are only decoys.
But there is a hidden PP
to the southwest that needz to be lowered  in order to get a hidden Coin (Coin #3).
Springz
#5 jumpz to the island with the SuperSpeed  powerupz behind the GPz and PPz , collectz all 3 SuperSpeed powerupz (Powerupz #1, #2 and #3), and returnz to the solid bridge island.
From there, he jumpz to the Blue Toggle Switch
 (BTS), then to a Purple Multi-Grunt Switch
  (PMGS).
Springz
#8 jumpz onto one(!) crumbling bridge tile , onto the single solid bridge tile , then southwest to the island with the remaining PMGS .When Springz
#8 hopz onto the PMGS , the hidden PP will be lowered .Springz
#4 (up north standing on the BHS ) hopz south through the corridor, through the first RR /arrowz obstacle, and across the bridge onto the island.Instead of trying to jump through the second RR
/arrowz obstacle, however, Springz #4 jumpz southwest to the Landing Dock .He should not attempt to hop along the automatic toggling bridge

 .
.Instead, he jumpz southwest, first momentarily onto the automatic toggling bridge
itself, then onto the southwest Landing Dock  of the automatic toggling bridge .
Then he jumpz southeast to the island to retrieve the Coin
(Coin #04) hidden between the tankz and crates.He backtrackz to the northeast island, and then back north to the BHS
.Springz
#5 and Springz #8 both return to the original island, then, from the middle tile of the bridge between the two RR /arrowz obstacles, jump to the area just to the west of the first RR /arrowz puzzle and head west to the YTS  .
.With Springz
#5 controlling the YTS to keep the RR confined, Springz #8 hopz past the double arrowz  .
.To do this, Springz
#5 hops on the YTS as soon as the RR beginz its rightward travel.Springz
#5 hopz off, then back on the YTS before the RR can pass over the leftmost TWA  .
.As soon as it is safe to do so, Springz
#5 then hopz onto the arrow and enterz the area with the RR , then hopz one tile south to safety.Springz
#5 standz as far to the right as possible below the path of the RR while Springz #8 standz as far to the right as possible in the area that he is in.As soon as the RR
hitz the right-hand arrow and beginz its travel to the left, Springz #8 hopz to the YTS .As soon as Springz
#8 beginz to enter the tile immediately to the right of the YTS , Springz #5 hopz toward the bottom right TWA .Springz
#8 hopz off, then back on the YTS .If timed correctly, Springz
#5 should have enough time to make it past the second TWA before Springz #8 togglez the TWAz to keep the RR confined.Springz
#5 hopz to the GTS and raisez the GPz .Springz
#8 can now let the RR loose, which harmlessly breakz when it hitz the GPz .Springz
#8 hopz on the YTS one more time, hopz onto the single arrow  and onto the TWAz and joinz Springz #5.
Springz
#5 hopz off, then back on the GTS and lowerz the GPz so Springz #8 can hop upstairs, then re-raisez the GPz for protection.Springz
#8 hopz towardz the enemy grunt  inciting an attack, then hopz to one side so the Bomber grunt runz past toward the GPz where he blowz up (himself and a nearby Rock Crystal
  ), setting off a chain reaction of TimeBombz under Rock Crystalz uncovering a pair of Gauntletz .
Springz
#8 pickz up the Gauntletz (Tool #8), breakz all the Rock Crystalz , uncovering another set of Springz and another GTS .Gauntletz
#8 putz on the Springz (Tool #9), stepz on the GTS to allow him to exit, collectz all 3 Coinz (Coinz #4, #5 and #6), and exitz this area to the left, then south, heading toward a CPS  .
.Springz
#5 followz Springz #8 out of this area and Springz #4 comez south through the first RR /arrowz obstacle, around the second and across the toggle bridge as before, and joinz Springz #5 and #8 at the double arrowz .All three proceed to the CPSz
.At this point, two of the three Springz
gruntz may go to trigger RW #2.When they return from RW
#2, all three Springz continue to the CPSz .On the way, one Springz
grunt jumpz across to the island with one of the invulnerability  powerupz (Powerup #4), collectz the powerup and returnz to the mainland to go the CPS .
At the CPS
, Springz #4, Springz #5, and Springz #8 wait.
#3 is waiting at the first CPS .He proceedz northwestward to the Spikez
 maze and jumpz through it to the megaphone where he callz for a pair of Gauntletz .
Give the Gauntletz
to Bare-handed grunt #1 (who becomez Gauntletz #1) trapped in the maze, who breakz the Rock Crystalz freeing himself and Bare-handed grunt #2.Both of them join with Springz
#3 and together, all three proceed to the arrowz  pointing to the east.
Ignore all the switchez and pyramidz in this area. They are decoys.
Once on the other side of the arrows, Bare-handed
grunt #2 pickz up the wingz  (becoming Wingz
  #2) while Springz #3 and Gauntletz #1 wait by the GPz to the north.
The enemy grunt
 can be ignored as he will not attack unless attacked.
Wingz
#2 fliez south to the GTS then back north to the mainland.He walkz further north to the single GP
and fliez around it to the GHS  , where he once again becomez Bare-handed grunt #2.
This letz Springz
#3 and Gauntletz #1 upstairs.Springz
#3 pickz up the Gauntletz lying on the ground (becoming Gauntletz #3) and breakz all three brickz blocking access to the two CPSz  .
.All three gruntz proceed to their respective CPSz
, where they wait.
#4, Springz #5, and Springz #8 are waiting.
Once across the checkpoint, any Springz grunt can jump to the island with the second invulnerability powerup (Powerup #5).Then one by one, all three Springz
gruntz enter the Green Warp  where they are teleported to the southeast corner of the map.
The first Springz
grunt (#4, for this walk-through) through the warp, jumpz to the south to retrieve a Coin (Coin #22) hidden among the eye candy.The second Springz
grunt (#5, for this walk-through) through the warp, headz north to the left Landing Dock of the pool on the left.The third Springz
grunt (#8, for this walk-through) through the warp, headz north to the right Landing Dock of the pool on the left.Springz
#4 stepz on the arrowz  pointing north leading him to the Wingz at the opposite end of the pool on the right.
There is no way to raise the bridge tilez in this pool.
Springz
#4 putz on the Wingz (becoming Wingz #4), walkz back to the Landing Dock  and fliez southward to the opposite Landing Dock .
He walkz west past Springz
#5 and #8, then north through the RR obstacle to the observatory.He fliez west across the front of the observatory to a piece of land on the other side. He fliez north again to the RR
in the shape of a rectangle.He walkz further north and fliez around the top right arrow
 .
.He pickz up the Gauntletz
(becoming Gauntletz #4) and waitz on the dock.The Springz
gruntz cross the pool using the crumbling bridge tilez .One Springz
grunt hopz northeast onto a Landing Dock mostly obscured by cratez and jumpz further northeast to the island with the Coin (Coin #22).After picking up the Coin
(Coin #22) he jumpz back to the Landing Dock , and, together with Springz 3, joinz Gauntletz 3 at the other Landing Dock .
Gauntletz #4 walks across the crumbling bridgez in a zig-zag pattern leaving enough tilez in place to allow both of the Springz gruntz to cross to the other side.Once across, Gauntletz
3 breakz the Rock Crystal behind the satellite to reveal a Coin (Coin #22), which only a Springz grunt can retrieve.Springz
3 hopz north up the left-side crumbling bridge path and jumpz northwest toward the RR obstacle instead of northeast where the dock is.He collectz the Coin
(Coin #22) and stepz on the hidden arrow and joinz Gauntletz 3.Springz
4 hopz up the right-side crumbling bridge path and joinz Gauntletz 3 and Springz 4.Gauntletz
3 breakz the Rock Crystal s on the right, and along with both Springz , proceedz east past the green enemy Swordz grunt.Gauntletz
3 absorbs one hit from the Swordz, but ignorez him and continuez to the east; both Springz , on the other hand, can get past the Swordz without taking a hit by jumping southeast onto the bridge, then back northeast.Do not step on the BOTS
otherwise the gruntz will be unable to complete the level.While both Springz
jump onto the purple switchez to lower the purple pyramidz to the south, Gauntletz 3 breakz the Rock Crystal s to clear a path for the Springz gruntz, then standz on one of the checkpoint pads.The Springz
gruntz follow and stand on the remaining checkpoint pads.All three gruntz stay here for the remainder of the level.
#1, Gauntletz grunt #3 and Bare-handed grunt #2 are waiting.
Both of the Gauntletz gruntz and Bare-handed grunt #2 work their way past the ten enemy gruntz  (no fighting is required!).
The Gauntletz
gruntz take a path east before turning south, while Bare-handed grunt #2 headz south before turning east.At the GPz
in the southeast corner, all three gruntz go through the GPz without fully releasing the RR that workz the GTSz controlling the GPz .Completely releasing the RR
or stepping on the switch at this point makez it impossible to complete the level.If the RR
is released, it will roll over the BOTS , lowering a Black Pyramid blocking access to the blue warpz but raisez a Black Pyramid blocking entry from the Sword maze to the next section.Once past the green pyramids, the Gauntletz
gruntz go over the one-way arrow to the west and defeat the purple enemy Barehand grunt. Gauntletz 1 breakz an iceblock hidden in the cratez and collectz a Coin (Coin #22) hidden underneath.Bare-handed
grunt #6, hidden among the tanks on the right hand side of this area, also walkz past the one-way arrow to where the Gauntletz and pickz up the Shovel  lying on the Purple Multi-Grunt Switch .
At this point, Shovel grunt
 #2 can go trigger Red Warp 3 provided that the Black Pyramid blocking reentry from Swordz maze has not been raised.
After returning from Red Warp 3, Shovel grunt
#2 exitz the Swordz maze through the green pyramidz, this time fully releasing the RR .It is important that Shovel grunt
#2 not step on the BOTS , but let the RR roll over it.To do otherwise blockz Shovel grunt
#2 from going any further and the level cannot be completed.While Shovel grunt
#2 proceedz past the one-way arrow, Bare-handed grunt #6 pickz up the new set of Wingz (becoming Wingz #6), walkz downstairs, and proceedz to the BOTS that is in the center of the square of arrowz with a RR rolling around it, flying only when absolutely necessary.After tripping the switch lowering the second Black Pyramid
, he fliez back, again conserving wingpower as much as possible.He joins both the Gauntletz
and the Shovel gruntz on the other side of arrow.Gauntletz
2 walkz west and pickz up the Goober Straw  , returnz and suckz up the lone puddle of goo
  . Shovel grunt #2 walkz to the blue warpz
  and digz under the right hand warp.
After digging in the same spot a second time, Wingz
and GooberStraw  enter the right hand Blue Warp (there are two there).
A Coin is revealed when the second grunt goez through the second warp.
Shovel pickz up the Coin
(Coin #22) and enterz the third blue warp, leaving Gauntletz 1 behind.
The blue warpz teleport all three gruntz to the west side of the level.Wingz
and GooberStraw each land on raised areaz while Shovel grunt #2 landz in the center of nine holez between the two raised areas.Wingz
and GooberStraw come downstairz and walk to the checkpoint to the west.Shovel digz the holez immediately to his north and his south three timez to reveal two coins.
After picking up the Coinz
(Coinz #23 and #24), Shovel walkz to the checkpoint.Activating this checkpoint lowerz the checkered pyramidz that have the lone remaining Bare-hand grunt trapped on the west side of the pool in the center of the map.
#7 walkz west and stepz on the arrowz facing south.Coming off the arrows, he walkz to the toggle bridge, crossez it, and continuez south along the western wall of the Fort.
When he reachez the toggle bridgez with the Rolling Rockz
, he carefully followz one Rolling Rock across the toggle bridge, then walkz west to the arrowz and "takez a ride" to the PMGS , movez to the east and waitz.At this point, Shovel grunt
#2 and Wingz grunt #6 can go trigger Secret Switch  #2 and collect the Warp letter
  .
.After returning from finding Secret ? Switch 2, the gruntz cross the open area where the UFO is wandering to the red pyramid maze.
One grunt workz his way through the red pyramid maze to the green toggle switch, lowering the green pyramid blocking the exit from the red pyramid maze and all work their way through the red pyramid maze to join Barehand who is waiting by the arrow maze.
All four gruntz, one at a time, enter the arrow maze by stepping on the center arrow that faces south and as each grunt exitz the maze, standz on a rightmost empty purple multi-grunt switch.
When the last grunt stepz on the last purple switch, a purple pyramid raises, killing the enemy Bomber grunt and blowing up his two companionz standing next to him.
With all three enemy gruntz gone, the green pyramidz are lowered and the missing bridge tilez raised.
Now all four gruntz proceed across the bridge to the checkpoint pads.
Once all four gruntz are on the checkpoint, some of the checkered pyramidz located at the Giant Rock near the Start Area are lowered. After activating the final checkpoint, the Barehand, Barehand/Wingz
and Shovel gruntz "sacrifice" themselvez on the Spikez z nearby and Straw suckz up their goo allowing one grunt to be baked in the GruntzOven.
The newly created grunt pickz up a pair of Gauntletz
that are located immediately to his right and breakz the Giant Rock, revealing the Warpstone.He pickz up the Warpstone, enterz the blue warp which teleportz him to the Fort, and he carriez the Warpstone to the king. Mission completed.